
SongbookPro
Table of Contents
Getting Started. . . . . . . . . . . . . . . . . . . . . . . . . . . . . . . . . . . . . . . . . . . . . . . . . . . . . . . . . . . . . . . . . . . . . . . . . . . . . . Ê3
Basic Navigation. . . . . . . . . . . . . . . . . . . . . . . . . . . . . . . . . . . . . . . . . . . . . . . . . . . . . . . . . . . . . . . . . . . . . . . . . . Ê3
Launching . . . . . . . . . . . . . . . . . . . . . . . . . . . . . . . . . . . . . . . . . . . . . . . . . . . . . . . . . . . . . . . . . . . . . . . . . . . . . Ê3
The Command Bar. . . . . . . . . . . . . . . . . . . . . . . . . . . . . . . . . . . . . . . . . . . . . . . . . . . . . . . . . . . . . . . . . . . . . . Ê3
Importing Songs . . . . . . . . . . . . . . . . . . . . . . . . . . . . . . . . . . . . . . . . . . . . . . . . . . . . . . . . . . . . . . . . . . . . . . . . . . Ê5
Create new song. . . . . . . . . . . . . . . . . . . . . . . . . . . . . . . . . . . . . . . . . . . . . . . . . . . . . . . . . . . . . . . . . . . . . . . . Ê5
Import file . . . . . . . . . . . . . . . . . . . . . . . . . . . . . . . . . . . . . . . . . . . . . . . . . . . . . . . . . . . . . . . . . . . . . . . . . . . . . Ê5
Import from web . . . . . . . . . . . . . . . . . . . . . . . . . . . . . . . . . . . . . . . . . . . . . . . . . . . . . . . . . . . . . . . . . . . . . . . Ê6
Using Sets . . . . . . . . . . . . . . . . . . . . . . . . . . . . . . . . . . . . . . . . . . . . . . . . . . . . . . . . . . . . . . . . . . . . . . . . . . . . . . . . Ê6
Creating Sets . . . . . . . . . . . . . . . . . . . . . . . . . . . . . . . . . . . . . . . . . . . . . . . . . . . . . . . . . . . . . . . . . . . . . . . . . . . Ê6
Editing Sets . . . . . . . . . . . . . . . . . . . . . . . . . . . . . . . . . . . . . . . . . . . . . . . . . . . . . . . . . . . . . . . . . . . . . . . . . . . . Ê7
Playing from Sets . . . . . . . . . . . . . . . . . . . . . . . . . . . . . . . . . . . . . . . . . . . . . . . . . . . . . . . . . . . . . . . . . . . . . . . Ê7
Adding notes . . . . . . . . . . . . . . . . . . . . . . . . . . . . . . . . . . . . . . . . . . . . . . . . . . . . . . . . . . . . . . . . . . . . . . . . . . . Ê7
Deleting and Sharing. . . . . . . . . . . . . . . . . . . . . . . . . . . . . . . . . . . . . . . . . . . . . . . . . . . . . . . . . . . . . . . . . . . . . . Ê7
Songs. . . . . . . . . . . . . . . . . . . . . . . . . . . . . . . . . . . . . . . . . . . . . . . . . . . . . . . . . . . . . . . . . . . . . . . . . . . . . . . . . . Ê7
Sets . . . . . . . . . . . . . . . . . . . . . . . . . . . . . . . . . . . . . . . . . . . . . . . . . . . . . . . . . . . . . . . . . . . . . . . . . . . . . . . . . . . Ê8
Useful Settings. . . . . . . . . . . . . . . . . . . . . . . . . . . . . . . . . . . . . . . . . . . . . . . . . . . . . . . . . . . . . . . . . . . . . . . . . . . . Ê8
Tablet or Laptop Mode? . . . . . . . . . . . . . . . . . . . . . . . . . . . . . . . . . . . . . . . . . . . . . . . . . . . . . . . . . . . . . . . . . Ê8
Personalise Song Styles . . . . . . . . . . . . . . . . . . . . . . . . . . . . . . . . . . . . . . . . . . . . . . . . . . . . . . . . . . . . . . . . . Ê8
Chord Notation. . . . . . . . . . . . . . . . . . . . . . . . . . . . . . . . . . . . . . . . . . . . . . . . . . . . . . . . . . . . . . . . . . . . . . . . . Ê9
Manual . . . . . . . . . . . . . . . . . . . . . . . . . . . . . . . . . . . . . . . . . . . . . . . . . . . . . . . . . . . . . . . . . . . . . . . . . . . . . . . . . . . Ê10
Adding Songs. . . . . . . . . . . . . . . . . . . . . . . . . . . . . . . . . . . . . . . . . . . . . . . . . . . . . . . . . . . . . . . . . . . . . . . . . . . . Ê10
Importing Files. . . . . . . . . . . . . . . . . . . . . . . . . . . . . . . . . . . . . . . . . . . . . . . . . . . . . . . . . . . . . . . . . . . . . . . . Ê10
Creating new songs . . . . . . . . . . . . . . . . . . . . . . . . . . . . . . . . . . . . . . . . . . . . . . . . . . . . . . . . . . . . . . . . . . . . Ê11
Search Online . . . . . . . . . . . . . . . . . . . . . . . . . . . . . . . . . . . . . . . . . . . . . . . . . . . . . . . . . . . . . . . . . . . . . . . . . Ê11
Live Buttons. . . . . . . . . . . . . . . . . . . . . . . . . . . . . . . . . . . . . . . . . . . . . . . . . . . . . . . . . . . . . . . . . . . . . . . . . . . . . Ê11
Customizing the live buttons . . . . . . . . . . . . . . . . . . . . . . . . . . . . . . . . . . . . . . . . . . . . . . . . . . . . . . . . . . . Ê12
Auto-Scroll. . . . . . . . . . . . . . . . . . . . . . . . . . . . . . . . . . . . . . . . . . . . . . . . . . . . . . . . . . . . . . . . . . . . . . . . . . . . Ê13
Metronome . . . . . . . . . . . . . . . . . . . . . . . . . . . . . . . . . . . . . . . . . . . . . . . . . . . . . . . . . . . . . . . . . . . . . . . . . . . Ê14
Freehand Notes . . . . . . . . . . . . . . . . . . . . . . . . . . . . . . . . . . . . . . . . . . . . . . . . . . . . . . . . . . . . . . . . . . . . . . . Ê16
Text Notes . . . . . . . . . . . . . . . . . . . . . . . . . . . . . . . . . . . . . . . . . . . . . . . . . . . . . . . . . . . . . . . . . . . . . . . . . . . . Ê17
Backing Tracks . . . . . . . . . . . . . . . . . . . . . . . . . . . . . . . . . . . . . . . . . . . . . . . . . . . . . . . . . . . . . . . . . . . . . . . . Ê18
Quick Links . . . . . . . . . . . . . . . . . . . . . . . . . . . . . . . . . . . . . . . . . . . . . . . . . . . . . . . . . . . . . . . . . . . . . . . . . . . Ê19
Quick Actions Menu . . . . . . . . . . . . . . . . . . . . . . . . . . . . . . . . . . . . . . . . . . . . . . . . . . . . . . . . . . . . . . . . . . . . . Ê21
Top Icons . . . . . . . . . . . . . . . . . . . . . . . . . . . . . . . . . . . . . . . . . . . . . . . . . . . . . . . . . . . . . . . . . . . . . . . . . . . . . Ê21
Full Menu Settings. . . . . . . . . . . . . . . . . . . . . . . . . . . . . . . . . . . . . . . . . . . . . . . . . . . . . . . . . . . . . . . . . . . . . Ê21
1

Editing Songs. . . . . . . . . . . . . . . . . . . . . . . . . . . . . . . . . . . . . . . . . . . . . . . . . . . . . . . . . . . . . . . . . . . . . . . . . . . . Ê22
Opening the editor . . . . . . . . . . . . . . . . . . . . . . . . . . . . . . . . . . . . . . . . . . . . . . . . . . . . . . . . . . . . . . . . . . . . Ê22
Editing formats . . . . . . . . . . . . . . . . . . . . . . . . . . . . . . . . . . . . . . . . . . . . . . . . . . . . . . . . . . . . . . . . . . . . . . . Ê22
Song sections . . . . . . . . . . . . . . . . . . . . . . . . . . . . . . . . . . . . . . . . . . . . . . . . . . . . . . . . . . . . . . . . . . . . . . . . . Ê23
Editing tips . . . . . . . . . . . . . . . . . . . . . . . . . . . . . . . . . . . . . . . . . . . . . . . . . . . . . . . . . . . . . . . . . . . . . . . . . . . Ê23
Song metadata . . . . . . . . . . . . . . . . . . . . . . . . . . . . . . . . . . . . . . . . . . . . . . . . . . . . . . . . . . . . . . . . . . . . . . . . Ê23
ChordPro . . . . . . . . . . . . . . . . . . . . . . . . . . . . . . . . . . . . . . . . . . . . . . . . . . . . . . . . . . . . . . . . . . . . . . . . . . . . . Ê24
Setlists . . . . . . . . . . . . . . . . . . . . . . . . . . . . . . . . . . . . . . . . . . . . . . . . . . . . . . . . . . . . . . . . . . . . . . . . . . . . . . . . . . Ê26
Creating Sets . . . . . . . . . . . . . . . . . . . . . . . . . . . . . . . . . . . . . . . . . . . . . . . . . . . . . . . . . . . . . . . . . . . . . . . . . . Ê26
Adding Content . . . . . . . . . . . . . . . . . . . . . . . . . . . . . . . . . . . . . . . . . . . . . . . . . . . . . . . . . . . . . . . . . . . . . . . Ê27
Sharing Sets. . . . . . . . . . . . . . . . . . . . . . . . . . . . . . . . . . . . . . . . . . . . . . . . . . . . . . . . . . . . . . . . . . . . . . . . . . . Ê29
Online Sync . . . . . . . . . . . . . . . . . . . . . . . . . . . . . . . . . . . . . . . . . . . . . . . . . . . . . . . . . . . . . . . . . . . . . . . . . . . . . Ê30
Configuring sync . . . . . . . . . . . . . . . . . . . . . . . . . . . . . . . . . . . . . . . . . . . . . . . . . . . . . . . . . . . . . . . . . . . . . . Ê30
Run a manual sync . . . . . . . . . . . . . . . . . . . . . . . . . . . . . . . . . . . . . . . . . . . . . . . . . . . . . . . . . . . . . . . . . . . . Ê31
Folders . . . . . . . . . . . . . . . . . . . . . . . . . . . . . . . . . . . . . . . . . . . . . . . . . . . . . . . . . . . . . . . . . . . . . . . . . . . . . . . . . Ê32
MIDI. . . . . . . . . . . . . . . . . . . . . . . . . . . . . . . . . . . . . . . . . . . . . . . . . . . . . . . . . . . . . . . . . . . . . . . . . . . . . . . . . . . . Ê32
Connecting devices . . . . . . . . . . . . . . . . . . . . . . . . . . . . . . . . . . . . . . . . . . . . . . . . . . . . . . . . . . . . . . . . . . . . Ê33
MIDI pedals. . . . . . . . . . . . . . . . . . . . . . . . . . . . . . . . . . . . . . . . . . . . . . . . . . . . . . . . . . . . . . . . . . . . . . . . . . . Ê33
Sending MIDI commands . . . . . . . . . . . . . . . . . . . . . . . . . . . . . . . . . . . . . . . . . . . . . . . . . . . . . . . . . . . . . . Ê33
Settings . . . . . . . . . . . . . . . . . . . . . . . . . . . . . . . . . . . . . . . . . . . . . . . . . . . . . . . . . . . . . . . . . . . . . . . . . . . . . . . . . Ê33
General Settings . . . . . . . . . . . . . . . . . . . . . . . . . . . . . . . . . . . . . . . . . . . . . . . . . . . . . . . . . . . . . . . . . . . . . . . Ê34
Foot Pedals . . . . . . . . . . . . . . . . . . . . . . . . . . . . . . . . . . . . . . . . . . . . . . . . . . . . . . . . . . . . . . . . . . . . . . . . . . . Ê36
Backup & Sync . . . . . . . . . . . . . . . . . . . . . . . . . . . . . . . . . . . . . . . . . . . . . . . . . . . . . . . . . . . . . . . . . . . . . . . . Ê38
Advanced Settings . . . . . . . . . . . . . . . . . . . . . . . . . . . . . . . . . . . . . . . . . . . . . . . . . . . . . . . . . . . . . . . . . . . . . Ê38
Licensing . . . . . . . . . . . . . . . . . . . . . . . . . . . . . . . . . . . . . . . . . . . . . . . . . . . . . . . . . . . . . . . . . . . . . . . . . . . . . . . Ê40
Pricing . . . . . . . . . . . . . . . . . . . . . . . . . . . . . . . . . . . . . . . . . . . . . . . . . . . . . . . . . . . . . . . . . . . . . . . . . . . . . . . Ê40
Using the app on multiple devices. . . . . . . . . . . . . . . . . . . . . . . . . . . . . . . . . . . . . . . . . . . . . . . . . . . . . . . Ê40
I have bought the app, but it’s showing the trial . . . . . . . . . . . . . . . . . . . . . . . . . . . . . . . . . . . . . . . . . . Ê40
SongbookPro Manager . . . . . . . . . . . . . . . . . . . . . . . . . . . . . . . . . . . . . . . . . . . . . . . . . . . . . . . . . . . . . . . . . . . . . Ê41
Connecting. . . . . . . . . . . . . . . . . . . . . . . . . . . . . . . . . . . . . . . . . . . . . . . . . . . . . . . . . . . . . . . . . . . . . . . . . . . . . . Ê41
Quick Connect . . . . . . . . . . . . . . . . . . . . . . . . . . . . . . . . . . . . . . . . . . . . . . . . . . . . . . . . . . . . . . . . . . . . . . . . Ê42
Managing Songs . . . . . . . . . . . . . . . . . . . . . . . . . . . . . . . . . . . . . . . . . . . . . . . . . . . . . . . . . . . . . . . . . . . . . . . . . Ê43
Creating new songs . . . . . . . . . . . . . . . . . . . . . . . . . . . . . . . . . . . . . . . . . . . . . . . . . . . . . . . . . . . . . . . . . . . . Ê43
Saving changes. . . . . . . . . . . . . . . . . . . . . . . . . . . . . . . . . . . . . . . . . . . . . . . . . . . . . . . . . . . . . . . . . . . . . . . . Ê43
Arranging Sets . . . . . . . . . . . . . . . . . . . . . . . . . . . . . . . . . . . . . . . . . . . . . . . . . . . . . . . . . . . . . . . . . . . . . . . . . . Ê44
Editing a set. . . . . . . . . . . . . . . . . . . . . . . . . . . . . . . . . . . . . . . . . . . . . . . . . . . . . . . . . . . . . . . . . . . . . . . . . . . Ê44
Sharing sets. . . . . . . . . . . . . . . . . . . . . . . . . . . . . . . . . . . . . . . . . . . . . . . . . . . . . . . . . . . . . . . . . . . . . . . . . . . Ê44
Browser Requirements. . . . . . . . . . . . . . . . . . . . . . . . . . . . . . . . . . . . . . . . . . . . . . . . . . . . . . . . . . . . . . . . . . . Ê45
2

Getting Started
Basic Navigation
Launching
Upon launching SongbookPro you will see the song display screen. From this screen you can access
all the different navigational tools, and the entire screen is used for displaying songs.
The bar at the top of the screen is called the ‘Command bar’ contains controls and menus to
navigate around the app.
The Command Bar
Songs and Sets
To access the 'Songs' and 'Sets' functions tap the menu button in the top left and the menu will
appear from the left. From here you can quickly change which song is being displayed from the
songs list.
SongbookPro has two modes of use: ‘Songs’ mode and ‘Sets’ mode, and you can switch between
them using the buttons at the very bottom of the main menu.
3

Songs allows you to open individual songs and is mainly used for practicing individual songs as
well as managing your song library.
Sets are where SongbookPro truly starts getting useful. A set is a collection of songs grouped into a
folder for playing one after another and are mainly used for performances as you can move
between songs with a simple swipe or tap.
Quick Actions Menu
Tap the ‘speed dial’ button in the right of the command bar and the quick actions will appear.
From here you can access several commonly used tasks on the current open song:
4

• Customise key
• Customise capo position
• Customise the duration of the auto-scroll feature
• Toggle lyrics on and off (where any chords are hidden)
• Adjust the cropping and framing of pdf files
There are also shortcuts here for toggling full-screen mode (try double-tapping the center of the
song viewer as a shortcut for full-screen mode) and synchronising your library with a cloud storage
provider.
Please see this page for more details.
Info Panel
The center of the Command Bar is used for displaying relevant information to you. It can currently
display the current song title, current song key or the time. Just tap the center of the bar to change
what it displays (or swipe it on Windows).
Importing Songs
To add new songs to your library, navigate to the main menu and switch to songs mode. Once in
songs mode you’ll see a ‘+’ button at the bottom of the menu, open this and you’ll be presented with
a choice of import options…
Create new song
This will launch the song editor, where you can create a new song from scratch. Give it a title, add
the contents of the song and add any other information you would like with in the other meta data
boxes.
All songs in your library have to have a key assigned to them, but if you don’t want to set this
manually leave the key box set to ‘Detect’ and SongbookPro will try to infer the key from the chords
in the song!
Please be aware that when the song content box is empty, a demo song shows up as a
demonstration of the required syntax. This song disappears as soon as any text is added to the
textbox.
Import file
From here you can select one or more songs to import into your library from existing files you may
have. The files must be in either the ChordPro, SongbookPro, Onsong or PDF file format. If you have
songs in standard text files that are just formatted in the ‘Chord over Lyric’ style, you should choose
to create a new song and then copy and paste the song in.
5

Import from web
You can also import songs directly from the internet into your song library. Currently the only
supported websites are UltimateGuitar.com and WorshipTogether.com but most songs can be found
in some form or another there. Select the site you want to search from the import pop up to open
an in-app search engine. From there you can search, choose the result you want, preview it, and
then import it into SongbookPro.
Note: to download songs from WorshipTogether.com you need a WorshipTogether account which
can be created for free.
Using Sets
Creating Sets
To create a new set switch to the sets menu and make sure you are on the ‘All Sets’ page, if not use
the back button at the top of the menu to navigate back to it. From the ‘All Sets’ page, you can create
a new set using the ‘+’ button at the bottom of the menu and can (optionally) give the set a title, and
date.
Once you have created a set you can start adding songs to it by selecting the + icon at the top of the
menu. Tap each song you want to add in turn and then tap the tick to confirm the selection. The
6

songs will be added to the set in the order selected and can be added multiple times to the same set.
Tap anywhere outside the side menu to close it and start using your new set.
Editing Sets
Editing sets is easy. You can re-arrange the order of the songs by long-pressing a song to pick it up
and then drag it to the new location.
Removing a song from a set varies depending on which version of the app you are using.
On Windows, start to drag it as if you were re-arranging the order and a red delete button will
appear over the set title. Drop the song onto this button to remove it from the set.
On all other platforms, swipe the item you want to delete to the right and a delete button will
appear. Tap the button to remove the song from the set.
If you want to change the name or date of a set, just tap the edit icon at the top of the menu. The
edit window will appear and you can make the desired changes.
Playing from Sets
Once you have a set with songs in it, tap the first icon in the set and then tap outside the menu to
close it. You are now viewing your set! You can navigate between sets/pages by swiping or tapping
on the relevant screen edge or by using the arrow keys. If you want to change the key or capo
position for any song, use the controls in the Quick Actions menu.
Adding notes
You can also add notes to your sets by clicking the page icon at the top of the menu and selecting
Notes. This adds a blank notes page to your set that you can move and delete like any other song. To
write your note, select it from your set list and then click the pen icon in the bottom right corner of
the display screen. The first line of the note becomes the title that is seen in the set list.
Deleting and Sharing
Songs
To delete or share songs from your library, make sure you are on the songs menu and tap the multi-
select toggle button in the bottom right of the menu. You can then select all the songs that you want
to delete/share.
7

To delete the selected songs, just tap the delete button and confirm.
To share the selected songs, tap the share button and then choose the file format you wish to use
and then choose either share (to share via email or similar) or save as (to save to your device).
SongbookPro is the recommended format as it can save all file information, but it is then only
possible to open the files in SongbookPro.
ChordPro is a common method for saving chord charts and it can be opened by a variety of
programs, however some information may be lost. If you are exporting multiple songs in the
chordPro format at the same time a zip archive will be created of the songs and that file will be
shared/saved.
Sets
To share, save or delete sets, navigate to the all sets view and then use the same process outlined
above.
You can also perform all of these operations on the current set selected from the current set menu.
Use the dropdown menu at the top to access all these features.
Note: Sets can only be shared/saved in the SongbookPro format.
Useful Settings
To access the settings menu, open the main menu and tap the settings icon at the bottom. From here
you can access a variety of settings and other features including this documentation, submitting
bug reports and requesting new features to be added to the app.
Tablet or Laptop Mode?
From the ‘General’ settings page you have the option to change how the app displays songs/sets.
When in tablet mode, the app will display each song on its own page as a scrollable window. This is
recommended for devices with touch screens.
When in laptop mode, the app will not allow the screen to scroll vertically. Instead the song will be
split across several pages to allow easier navigation for non-touch devices. You can also specify the
number of columns you want songs to be displayed in when in this mode.
Personalise Song Styles
From the ‘Personalisation’ settings page you can adjust the font sizes and colours of songs. These
styles are global settings and therefore apply to all songs viewed anywhere in the app.
Please note: the lyric size setting sets the desired font size. If the lines of a song are two long to fit on
the screen at this font size, the lyrics will be displayed at a max possible size such that they fit.
8

Chord Notation
This setting allows the app to be switched to using German style chords (uses H/B instead of B/Bb).
This setting can be found on the ‘General’ settings page.
9

Manual
Adding Songs
Importing Files
To import existing songs into SongbookPro, open the ‘All Songs’ sidebar menu and tap the ‘+’ button
at the bottom of the menu. This will provide you with several options for importing songs, creating
songs from scratch or searching online.
To import files from your device, choose ‘Import files’ and select the files you want to import. On
Android, multiple files can usually be imported at the same time by long pressing on one file to
enter multi-select mode.
On Android and iOS, it is also usually possible to import files from cloud storage providers. If the
app for the cloud storage provider you want to import from is installed on your device, you should
be able to navigate to the files using this method.
You can also import files by:
• Opening the file elsewhere and choosing ‘SongbookPro’ as the app to open the file with
10

• Drag the files into SongbookPro (Windows only)
• Import files from your computer via SongbookPro Manger
Song Formats
SongbookPro can import files in the following formats:
• .txt
• ChordPro (cho, crd, chordpro, chopro, chord, pro)
• pdf
• SongbookPro files (.sbp)
• SongbookPro Backup files (.sbpbackup)
• Onsong exports (.onsong, .onsongarchive, .archive, .backup)
• .docx
Additionally, .zip files containing acceptable formats can be uploaded (not available on Windows
currently).
Creating new songs
To create new songs from scratch, follow the procedure above and then select ‘Create new song’
from the menu. This will open the new song editor where you can write out your songs from
scratch.
Additionally, new songs can also be created using SongbookPro Manager from a computer.
Search Online
Songs can also be imported from online websites directly within the app. To do this, follow the steps
above and choose ‘Search Online’ from the menu.
This will open the search window where you can search by title or author for songs and select the
website you want to search. Currently UltimateGuitar.com (free version only),
WorshipTogether.com and e-chords.com are supported.
Some search sites support filtering songs by instrument. If this is supported, a filter icon will show
up in the top right corner of the app while on the search page.
Live Buttons
At the bottom right of the home screen there are a selection of buttons, called the Live Buttons.
These buttons provide a quick way to toggle common features on and off, even while playing live.
11

There are live buttons for:
• Auto-Scroll
• Metronome
• Freehand Drawing
• Text Notes
• Backing Tracks
• Quick Links
Customizing the live buttons
The Live buttons can easily be customized from the settings menu, allowing you to add, remove and
re-order them to suit your needs.
Open the app settings, choose the General settings page and scroll down to the ‘Live Buttons’
section. From here you can re-order the buttons by dragging them into the positions you want and
hide any buttons you don’t want to see by tapping the “Add/Remove” button.
12

Auto-Scroll
13

Toggling the Auto-Scroll
SongbookPro includes an auto-scroll feature to enable hands-free operation when playing a song
that doesn’t fit on a single page.
To toggle the auto-scroll on and off, just tap the down arrow in the live buttons. It will light up
green when auto-scroll is enabled.
Set the scrolling speed
To edit the scrolling speed, open the Quick Actions menu and use the ‘Auto-scroll speed’ slider. This
sets the duration of the song and this is the same time that the auto-scroll will take to scroll from
the top of the song to the bottom.
By default, songs will initially have their duration set to 90 seconds.
Metronome
Using the Metronome
SongbookPro includes a built in visual metronome to help you play at your best.
To toggle the metronome on and off, just tap the metronome Live button and the visual metronome
will start if there is a tempo set for the song.
If you move between songs with the metronome enabled, the tempo of the metronome will change
to the song currently being displayed.
Setting the Tempo
The first time you start the metronome for a song, the tempo box will show allowing you to set the
tempo you want for the song. If you need to edit the tempo in the future, long pressing the
metronome Live Button will also show this box allowing the tempo to be edited.
14

There are multiple ways to set your desired tempo using this control:
• Tap the central box at least 4 times with the tempo you want to set
• Slide your finger up and down (starting from within the inner box) to increase or decrease the
tempo
• Use the + and – buttons to fine tune the tempo
Metronome Settings
The metronome provides some advanced settings to allow greater control of how it operates. To
adjust these settings navigate to the app settings and open the Advanced menu.
From this menu, you can adjust whether the app bar flashes on the metronome ticks (or just the
live button) and also set the time out behaviour.
The timeout setting controls how long the metronome stays running for after you’ve turned it on:
• Never
The default option, the metronome will keep running until it is manually stopped
• After 10s
The metronome will automatically turn itself off after 10 seconds, useful if you just need to set
the speed at the start of the song
• After 10s, resumes after changing song
The same as above, except the metronome will restart for another 10s once you move to a
different song.
15

Freehand Notes
Drawing mode
To enter drawing mode, tap the live button showing a 'paint brush' icon in the bottom right corner
of the home screen.
Once you are in drawing mode, the app bar will change and show the drawing controls. Select a
brush and start annotating your songs with notes. The eraser can be used to remove individual
lines and the undo will revert the last action. You can use the delete button to remove all the
drawings.
Once you have finished, use the back button to save the notes.
Customising the pen
To customize the style of the pens, select the pen you wish to change and then tap on it again. This
will open the pen edit pane allowing the color, thickness and opacity of a pen to be customised.
16

Scrolling and zooming
When in the freehand drawing mode, you can zoom the song in/out and pan around the song using
two fingers. A pinch-to-zoom gesture will zoom the song where as scrolling can be achieved by
placing two fingers on the screen and panning around.
Text Notes
Adding notes to songs
To add notes to a song, tap the notes live button to open the editing popup. This contains a textbox
for you to type your notes and a few display options at the top.
17

The notes live button
Display modes
In the notes popup, there is a dropdown for selecting how you want the notes to display. The
options are:
• Inline: Your notes are placed between the song title and body
• Overlay: When you open a song or move to a song within a set that has notes associated with it,
the notes will display in a popup over the screen.
The amount of time that this overlay is displayed for can be changed from a dropdown in the
notes popup and you can tap the screen at any time to instantly hide the overlay.
Notes in sets
If you add a note to a song within a set, the note will only be shown within that set. As such you can
add performance specific notes without your notes showing up in other sets.
Backing Tracks
To link backing tracks to a song, select the play icon Live Button, then select the audio provider you
wish to use. On Windows, only pad backing tracks are currently supported.
18

Local files
Find and select local audio files on your device to link to a song.
Spotify
Select this option to link songs from Spotify to the current song. To use this feature, you need to
have the Spotify app installed on your device and need to be subscribed to Spotify Premium.
Pads
Link a key-dependent ambient backing track to the current song. The first time you select this
option, you will be prompted to download the SongbookPro Pad set.
Quick Links
Enabing quick links
The Quick Links live button isn’t enabled by default but can be easily enabled from the apps
settings.
Open the apps general settings page and scroll down to the 'Live Buttons' section. Press the
'Add/Remove' button and use the popup to enable the feature.
19

Quick Links
After the Quick Links live button has been enabled, the new button will be visible in the bottom
right corner of the home screen with a lightning bolt as it’s icon.
Tapping this icon will open the quick links overview, giving fast access to some useful advanced
features.
• Open web search
If you need to find a new song quickly, this link will open the online song search screen in fewer
taps than using the side menu.
• Backup library
Selecting this option will create a backup file of your whole library and then open the
20

save/share dialog to allow you to save the backup to your device or to cloud storage.
• Edit section order
Instead of opening the edit screen and navigating to the correct tab when changing the order in
which song sections are played, use this quick link to quickly change this setting on the fly.
Quick Actions Menu
The Quick Actions menu provides you with quick access to commonly used functions of the app. To
open the Quick Actions menu, tap the icon on the right side of the Command bar.
The menu is split into two parts, the top icon row and the main body of the menu.
Top Icons
• Cloud Sync
Manually start a cloud sync
• Web
If a website is assigned to the current song, it will open that site in your browser. Otherwise the
song will be searched for on YouTube.
• Fullscreen
Toggles fullscreen mode on and off. Fullscreen mode can also be toggled on and off by double-
tapping the center of the song viewer.
Full Menu Settings
The rest of the settings vary depending on whether the current song is a text-based song (ChordPro)
or a PDF.
Common Controls
• Auto-Scroll
Use this control to set the duration of the current song for the auto-scroller.
• Reset Zoom
This allows the zoom of a song to be set back to its default level. This control only shows when
the current song has been zoomed using a pinch-to-zoom guesture. Use this control to set the
duration of the current song for the auto-scroller.
ChordPro
• Key
Use this dropdown to select the key you want to transpose the song to.
• Capo/transpose
Use this control to set the capo you want to use in the song. The chords will adjust such that
when you play the chords with that capo, they will be in the key set in the box above.
• Lyrics mode
This allows the chords to be hidden such that only lyrics are displayed.
21

PDF
• Crop
Opens the cropping view, allowing you to crop extra space from the pdf for the best viewing.
• Invert Colors
Inverts the color of the pdf documents, useful if you are using the dark theme.
Editing Songs
Opening the editor
To edit a song, open the song editor using the pencil icon in the app bar. After you have finished
editing, use the save icon to save and exit the editor.
Editing formats
When editing songs, two formats can be used: "Chord over Lyrics" or ChordPro. These formats can
be switched between using the switcher in the 'General' editing tab.
• Chords over Lyrics
When editing in this format place the chords in the line above the lyrics that they correspond to.
If you want to add non-chord text to chord lines, place them in brackets otherwise the line won’t
be rendered properly as chords.
Verse 1:
Ê D G D (x2)
Amazing Grace, how sweet the sound
• ChordPro
Using this mode you can edit your songs in the standardised ChordPro format. More details can
be found link:{{< ref "/docs/manual/editor/chordpro" >}}[here].
{c: Verse 1}
Amazing [D]Grace, how [G]sweet the so[D]und [(x2)]
22

Song sections
The chord sheet formatting system can style different song sections differently in accordance to
your settings. For this to work correctly, you do need to mark the song sections using headers in
your songs. This is done differently depending on the editing format used.
• Chords over Lyrics
Add a : (colon) to the end of the header line.
Verse 1:
• ChordPro
Wrap the section header in a comment ChordPro directive.
{c: Verse 1}
Editing tips
Phones and tablets will often hide extra spaces and insert full-stops when you double-tap space.
This can cause issues when editing songs so we recommend you disable these settings from your
device’s keyboard options.
If you are doing lots of editing, you may want to try using SongbookPro Manger to enable you to
edit from a computer with a keyboard and mouse.
Song metadata
Songs also contain lots of meta data, which can be customized using the settings in the tabs at the
top of the editor.
• Tags
You can add tags to songs to help to organize your song library. Once you have added tags to
your songs, you can search and filter by tags in the song list.
• Duration
If you set the duration for songs, this allows the duration of set lists to be calculated and is
displayed in the set editing menu. This value is also used for the default auto-scrolling speed if it
is specified.
Note, this feature is not available on Windows.
• Web URL link
By default, tapping the globe icon in the Quick Actions menu opens a YouTube search for the
23

current song. You can override this behavior by specifying a different URL here which will be
opened instead.
• Section Order
You can customize the order that song sections occur using this field. If you set this field on a set
item it will not affect the base song, only the set item.
For example: V1 V2 C V4
ChordPro
ChordPro is a standard format for writing chord sheets. In ChordPro format, chords are placed
inline with the lyrics in square brackets and extra information is added using ChordPro directives.
ChordPro directives are placed on their own line and take the form:
{ directive: value }
For full details of the ChordPro format, see the ChordPro website.
Chords
In ChordPro formatting, chords are placed inline with the lyrics wrapped with []. This benefit of
this is the chord alignment is maintained even if edits are made to the lyrics.
Inline comments
If you wish to place text which aren’t chords on the lyrics line, surround them with brackets. For
example:
My [Dm7 (play twice)]lyric line
becomes
Ê Dm7 (play twice)
My lyric line
Example
{c: Verse 1}
Amazing[D] Grace, how s[G]weet the so[D]und,
that saved a wretch like [A7]me
I onc[D]e was lost, but n[G]ow am fo[D]und,
was blind, but [A7]now I s[D]ee.
Supported directives
SongbookPro supports most standard ChordPro Directives as well as a few custom directives for
SongbookPro specific features.
24

See below for a full list of supported directives:
Standard directives
• Section headings
{c: Verse 2}
Use the c or comment directives to add section headers to your songs.
• chorus
• verse
• bridge
• start_of_chorus / end_of_chorus (soc / eoc)
• start_of_verse / end_of_verse (sov /eov)
• start_of_tab / end_of_tab (sot / eot)
• textcolor
{textcolor: red} or {textcolour: #F00}
This directive sets the color for the rest of the section.
Any set color can be reset with an empty {textcolor} tag.
• textfill
{textfill: red}
The same as textcolor but for highlighting.
Import only directives
These directives are have no effect in the in-app editor, but are supported when importing or
exporting songs.
• Title (t)
• Subtitle (st)
• Artist
• Composer
• Lyricist
• Copyright
• Footer
• CCLI
• Key
• Time
• Tempo
• Duration
• Capo
• Meta
25

Custom directives
• x_sbp_tags / x_spb_tag
{x_sbp_tags: slow, waltz}
When importing songs into SongbookPro, you can specify song tags using this directive.
Setlists
Setlists are a convenient way to group songs together for playing at a specific event. By arranging
songs into a setlist, you can pre-arrange the songs you want to play into the correct order and then
swipe between them while playing live.
You can also add notes, timers and other useful items to your sets to keep everything you need
while performing in one place.
Creating Sets
Creating Sets
To create a new set, switch to the sets menu and make sure you are on the ‘All Sets’ page, if not use
the back button at the top of the menu to navigate back to it. From the ‘All Sets’ page, you can create
a new set using the
button at the bottom of the menu and can (optionally) give the set a title, and date.
26

Editing Sets
To edit the details of a set, open the set and press the edit button
at the top of the screen. From here, you can edit the name or date of the setlist.
Setlists are ordered in your library by the date assigned to them, so editing the date on sets will
change the order they are displayed in.
Adding Content
Windows does not currently support adding notes to setlists
Adding Songs
To add songs to a set, press the
button at the top of the sidebar with the current set open.
Tap each song you want to add in turn and then tap the tick to confirm the selection. The songs will
be added to the set in the order selected and each song can be added multiple times to the same set.
The order of songs in a set can be changed by long-pressing and dragging the item to a new
position.
27

Adding Notes
Full page notes can also be added to sets. This can be used to add non-song items to your set or just
as a marker to indicate a break in your set.
To add a note to a set, press the
button and select 'Notes'. This will add a blank note to your set which you can then edit by moving
to it in the set, and pressing the
button at the bottom of the screen.
In addition to adding text notes, timers and stopwatches can also be added to your setlist from the
same menu.
Templates
If you often need to add the same note to lots of different setlists, you can make a template to speed
this up.
To access the template menu, press the
button and select 'Templates'. From this menu, you can create a new template or add an exiting
template to your setlist.
Templates can also be created and edited from SongbookPro Manager.
Removing items from a set
Removing an item from a set varies depending on which version of the app you are using.
On Windows, start to drag it as if you were re-arranging the order and a red delete button will
appear over the set title. Drop the song onto this button to remove it from the set.
On all other platforms, swipe the item you want to delete to the right and a delete button will
appear. Tap the button to remove the song from the set.
28
Sharing Sets
Sharing with other SongbookPro users
To share sets with other SongbookPro users, open the sidebar and navigate to the set you with so
share. Tap the
button to open the sharing menu and choose 'Share'.
This will generate a .sbp file which you can then share via email, a messaging app,
Bluetooth/airdrop or save onto your device. Another user of SongbookPro can then import this file
onto their device to add the set (and the songs required for it) into their library.
You can also share a setlist from the 'All Sets' view, by swiping the set to the right and selecting the
'Share' option.
29

Printing sets
You can also print your setlists out so that you can share them with people who don’t use
SongbookPro.
To do this, navigate to the same
menu as described in the previous section, and choose one of the print options.
Selecting Print will open up your device’s print screen allowing you to print all the songs in your
set.
Selecting Print Overview, however, allows you to print a running order for your set without
printing the full songs.
Print to PDF
If you wish to save these as PDF documents instead of printing them directly, you can do this from
the print preview screen.
Android: Choose 'Save as PDF' as the selected printer.
iOS: Perform a pinch-to-zoom gesture on the pdf preview, and then press the share icon in the
corner. Use the options here to save or share the pdf file.
Online Sync
SongbookPro has a powerful synchronisation feature, enabling you to synchronize your song
library between copies of SongbookPro on multiple devices.
Cloud sync is also an excellent way to backup your library automatically, allowing you to easily
restore all your songs if anything to goes wrong.
Configuring sync
To use cloud sync you need to have an account with either OneDrive, Dropbox or a WebDAV
provider. If you don’t have an account with one of these storage providers you can create one for
free.
Next open the Settings menu and navigate to the ‘Backup & Sync’ page and enable the feature using
the toggle next to ‘Online Sync’.
30

Next, select the cloud storage provider you want to use from the ‘Provider’ dropdown. This will
open a window prompting you to sign into your account and accept any required permissions. You
should use the same provider and account for all devices you want to sync together.
If the sign in was successful, you will be given the option to start synchronising straight away.
You can also set the app to sync automatically using the other options in this section.
Run a manual sync
If you ever want to start a sync manually, it’s really easy. Open the Quick Actions menu and press
the ‘curly arrows’ button at the top. This icon will then start spinning indicating that a sync is
currently running. Once the sync is complete this button will stop spinning and if any errors
occurred it will turn red to indicate this.
31

Folders
If you play in different bands or play different types of songs, having all your songs in one library
can be problematic. By using folders, you can split your library up into smaller sections for better
organisation.
To get started using folders, open the songs menu and tap the arrow next to ‘All Songs’. This opens
the folder menu where you can select an existing folder or create a new folder using the ‘+’ button
at the bottom of the menu.
After creating a new folder, swipe it to the right to reveal more options. This provides options for
adding songs to the folder, changing the folders name and deleting the folder.
MIDI
SongbookPro supports connecting to bluetooth MIDI devices for both sending and receiving MIDI
messages.
32

Connecting devices
To connect to pedals, enable the MIDI feature on the 'Foot Pedals' settings page. Pick your device or
press the refresh arrow to scan for new devices. The device you are connecting must not already be
connected to your phones Bluetooth.
MIDI pedals
MIDI based foot pedals can be used with the foot pedal system for navigating the app. To configure
foot pedal actions on MIDI foot pedals, connect the MIDI device as described above and then follow
the same process as keyboard-event based foot pedals.
Sending MIDI commands
Individual songs can have MIDI events assigned to them, which will be sent to connected MIDI
devices when the song is opened. To set a midi event to a song, press the 'MIDI Events' button in the
song’s link:{{<ref "/docs/manual/editor/" >}}[advanced edit] tab. Then pick the event you wish to
send. For this option to show up, you first need to enable the MIDI feature from the 'Foot Pedals'
page as described above. Currently, only one MIDI event can be configured for each song.
Settings
SongbookPro has an extensive settings menu to allow you to fully customise the app.
The following pages provide detailed information of what settings are available on each of the
settings pages in the app.
33

General Settings
Theme
The theme selector is the easiest way to customise SongbookPro. Choose the light or dark theme to
set the theme for the app.
34

Instrument
Use this control to select your main instrument. This changes the behaviour of SongbookPro to
work best for you.
On Windows, this sets the instrument to use for chord diagrams. Chord diagrams are not yet
supported on other platforms, so this control only performs minor adjustments to the interface. For
example, the ‘Capo’ setting is renamed ‘Transpose’ when instruments other than guitar are selected.
Chord Notation
If you use the German chord system (H/B instead of B/Bb) or Latin notation, changing the chord
notation setting to “German” will show your songs in the alternative scheme. Please be aware that
regardless of this setting, songs are expected to be in the standard chord notation when they are
imported. The in-app song editor and the rest of the app will respect this setting however.
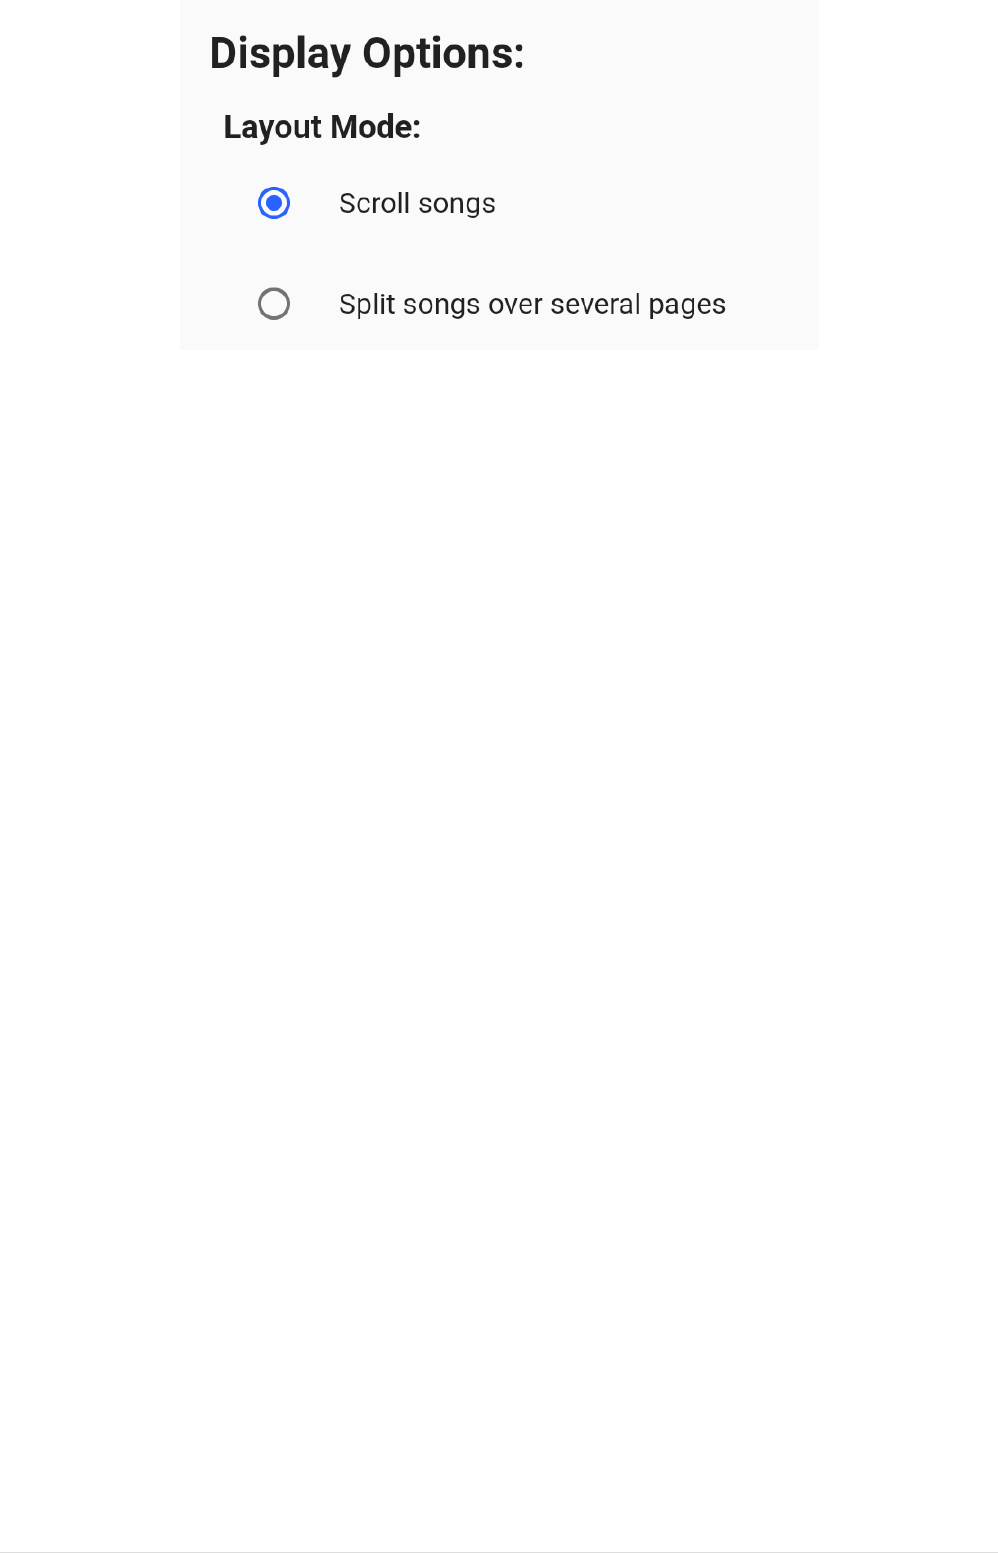
Layout Mode
The display mode changes how songs get laid out when they are displayed:
• Auto
If the song can be displayed on a single page it will be, otherwise scrolling will be used.
• Scroll songs
This will show each song in a single column and the screen can be scrolled if the song is longer
than the screen. This is ideal for tablets and other portrait displays and the autos roller can be
used In this mode for a truly handfree experience.
• Split songs into pages
In this mode songs are split into columns and pages to provide the most space efficient display.
The app will use as many columns as it can fit to optimise screen space and you can swipe
sideways to move between pages.
• Fit to page (Windows only)
In this mode songs will be forced to display on a single page. The font size will be reduced in
some cases to make this possible.
35
Live Buttons
This control allows you to customise the order and visibility of the Live Buttons. Use the
Add/Remove button to how and hide different buttons and drag the icons to re-arrange them. More
information about Live Buttons can be found here.
Multiple page indicator
When two or more pages are currently available in the song viewer, a progress bar will show along
the bottom of the screen by default. You can customize this feature here or remove it completely.
This is not currently available on Windows.
Foot Pedals
Setting up foot pedals
After the pedal is connected to your device via Bluetooth, navigate to the 'Foot Pedals' page in the
settings. By default there will be two pedal actions setup, although these may not work with your
foot pedal by default.
To configure your foot pedal, add a new pedal action with the '+' button. A new pedal action will
appear, prompting you to press the foot pedal you wish to setup. If this is successful, a trigger icon
will replace the orange text.
You can then use the dropdown in the pedal action to set what the pedal should do. Repeat this for
as many pedals as you wish to configure.
36

Supported pedals
SongbookPro is compatible with any Bluetooth foot pedal capable of sending keyboard keys. Almost
all Bluetooth foot pedals are capable of doing this, but please do check before purchasing any pedal.
These are some common pedals that are compatible, but this isn’t an exclusive list and others will
work too. If in doubt, feel free to contact us to double check.
• Airturn (all models)
◦ BT200S-2
◦ BT200S-4
◦ BT200S-6
◦ Duo 200
◦ Quad 200
◦ PEDpro
• Pageflip (all models)
◦ Butterfly
◦ Firefly
◦ Dragonfly
37

• iRig Blueturn
◦ Amazon.com
• STOMP Bluetooth
◦ Amazon.com
• Donner page turner
◦ Amazon.com
These are affiliate links to help support the development of SongbookPro.
Backup & Sync
Backup
From here, you can export and save a full backup of your whole song library formatted as a
.SBPBackup file. This includes all songs and setlists, but does not include the values of any settings
you may have set.
Use the restore option here to restore any backup you have created.
Note: If the you try to import a backup containing a song that is already in your song library, a new
song will not be created but instead your existing song will be used. For two songs to be classed as
identical, they have to have the same title and body (Chords and lyrics).
Auto Backup
SongbookPro can automatically create a local backup file of your library on a weekly basis by
enabling this feature. If possible, you should choose an SD card as the backup location for the data.
Online Sync
You can sync your SongbookPro library to the cloud to synchronise your library between multiple
devices running SongbookPro or just use it as an easy way to backup your library. For detailed
instructions on using the online sync feature, please see the article here.
Advanced Settings
38

Metronome
Metronome timeout
Setting a metronome timeout will disable the metronome 10s after it starts.
Flash on tick
When enabled, flashes the command bar in addition to the metronome button on each tick.
Enable metronome audio
When enabled, the metronome produces an audio click in addition to the visual flash.
Auto-Scroll
The auto-scroll delay setting can be used to add delay the start of the scrolling once the auto-scroll
has been enabled. The 'Duration' option allows for the length of delay to be customized.
When this feature is in use, you can press the auto-scroll button again to start scrolling
immediately.
ChordPro
Long lines
You can configure how SongbookPro should handle lyric lines which are too long to fit on a single
line. You can either let SongbookPro identify a suitable point to split the line into two, or you can
elect to reduce the font size of the whole song such that no breaks are required.
Monospace chord lines
To preserve perfect spacing for intro/rift sections, this features forces SongbookPro to display
chord-only lines in a monospace font.
Configure accidentals
When choosing between two musically equivalent chords (e.g. Eb vs D#), SongbookPro usually
selects the chord which is musically correct given the current key. You can use the controls here to
override this behavior and force a certain chord to be preferred.
PDF
Auto crop on import
When importing PDF songs, SongbookPro can automatically remove any excess margins from the
file. This crop can be adjusted later using the crop option in the Quick Actions menu.
Quality
This setting controls the level of detail to which PDF files are rendered. Medium is the default and
should be used unless you have performance/quality issues.
Using a higher setting, will result in PDF-based songs taking longer to open, especially on lower-end
devices.
Display mode
The layout mode which is set in the general settings page can be overridden for pdf files here.
39

Printing
Basic printing options can be configured here as well as viewing an example of what a song would
look like printed using the current settings. The font-size settings sets the base font-size for chords
and lyrics, with the font-size for titles and headings being set based on this.
When 'Print in color' is enabled, lyric sections will be colored with the settings set in the
'Personalisation' settings page when the global theme is in light mode.
Licensing
Pricing
The pricing varies depending on your currency, but is approximately $6.99 USD. Exact pricing is
shown in the app before purchasing.
Using the app on multiple devices
The app is sold separately on different platforms (e.g. iOS, Android, Windows, Amazon Fire).
If you own multiple devices of the same platform, you can do so without an additional purchase as
long as they are all signed into the same Apple/Google/Microsoft account. If the devices are on
different platforms however you would have to make an additional purchase. This is because the
licensing is linked to your Apple/Google/Microsoft account.
I have bought the app, but it’s showing the trial
This can happen for a number of reasons, please follow the following steps to resolve this:
1. Check that your device is connected to the internet.
2. Open the app store app on your device and ensure you are correctly signed in to the same
account you used to purchase the app.
3. Restart the device (this often forces the app store app to update it’s license data)..
4. Open SongbookPro, navigate to the 'Buy it now' page in the settings and then press the 'Restore'
button.
40

SongbookPro Manager
Tablets are great for using SongbookPro on stage, but managing your song library can be rather
annoying without a physical keyboard. To solve this problem we created SongbookPro Manager, a
way to edit your song library easily and intuitively from any computer connected to the same WiFi
network.
Editing existing songs, creating songs from scratch and importing songs from files are all supported
with SongbookPro Manager.
Additionally, you can also use SongbookPro Manager for creating and managing set lists as well as
organizing folders.
SongbookPro Manager is bundled with all copies of SongbookPro (except for Windows) for free and
can run on any modern web browser. Editing your songs has never been so easy!
Connecting
To get started, ensure that both the device with SongbookPro installed on and the computer you
want to connect are connected to the same WiFi network.
Next, start SongbookPro Manager by opening the … menu in the top right corner of the app and
choose ‘SongbookPro Manager’. A popup will show informing you that SongbookPro Manager is
running and giving you the address you need to connect to the app.
This address will look something like: http://192.168.1.25:8080
41

Navigate to this address in your browser by typing it into the address bar at the top and pressing
the return key. This will connect your browser to the app and you should see a loading screen.
The final step is to authorise the connection. At this stage, another popup will have opened on the
app asking if you want to accept the connection from your browser. Choose ‘yes’ to confirm the
connection and you will see you song library appear in your browser window.
From here you can import, edit, create or delete songs, arrange sets or modify folders!
Quick Connect
SongbookPro Manager Quick Connect is a tool to help simplify the process of connecting to
SongbookPro Manager.
Once the feature is enabled and you have activated SongbookPro Manager from within the app,
you only need to navigate to https://qc.songbook-pro.com instead of the complex and variable IP-
based address.
Please note, SongbookPro Manager Quick Connect does store your IP address for up to 1 hour. No
42

other personal data is stored.
Managing Songs
It is easy to add and edit songs using SongbookPro Manager, select the 'Edit' tab at the top of the
interface to enter song editing mode.
While on this screen, you can select a song on the left panel and make changes using the central
panel. As you make changes, the preview on the right will update in real-time to show you what the
song will look like once rendered in the app.
Creating new songs
To create a new text-based song, use click the 'New' button on the right of the app bar. This will
create a new empty song that you can then type or copy in the contents.
Adding PDF songs can also be done by using the 'Upload' button on the app bar. This feature can be
used to import any file type which can be imported into SongbookPro.
Saving changes
Your changes are automatically saved whenever you change the selected song, navigate to a
different page or close the window. You can also force the song to save at any time by using
pressing Ctrl-S on your keyboard.
If you wish to reset the changes you have made to a song so it doesn’t save, you can do this using
the '…' menu in the central panel.
43

Arranging Sets
Using SongbookPro Manager you can also create and edit set lists. To access this feature, select the
'Arrange' tab at the top of the interface.
From this page you can open any of your sets from the sidebar, or create a new set using the 'New
Set' button at the top of the sidebar. This will open the selected set in the central panel for editing.
Editing a set
Adding songs
To add songs, press the '+' at the top right of the central panel. This will open a popup allowing you
to add songs to the list.
Changing title & date
To change the set’s title or date, click on the field you wish to edit it will become editable. Pressing
enter or the green tick will save the changes.
Rearranging songs
To rearrange songs in the set lists, use the drag handle on the left of the songs to move the songs
into the desired order.
Sharing sets
You can share set lists with other SongbookPro users by clicking the share icon in the right side of
the top bar. This will generate and download a .sbp file which you can then send to other people
and they will be able to import the file into SongbookPro on their device.
44

Browser Requirements
As SongbookPro Manager requires modern web technologies to function, some older browsers are
not compatible. In addition, JavaScript has to be enabled on your browser in order for SongbookPro
Manager to function.
Compatible browsers:
• Chrome
• Firefox
• Edge
• Safari 9.1+
45
