
1 | razer
Razer Comms is a revolutionary software that brings the ease and convenience of
leading instant messaging applications together with your favorite games for free.
From here on out, you have the ability to socialize with your friends without
compromising your gameplay. Built with advanced cross game chat support meant to
be used in-game, and with the crystal clear audio that you’d expect from Razer, Razer
Comms will give you the freedom to discuss tactics in an intense frag-fest, or to smack
talk foes before owning them. This is how gamers were meant to communicate.
2 | For gamers. by gamers.™
TABLE OF CONTENTS
1. SYSTEM REQUIREMENTS ............................................................................ 3
2. INSTALLATION ............................................................................................ 3
3. ACCOUNT MANAGEMENT .......................................................................... 5
4. FRIEND LIST MANAGEMENT ..................................................................... 17
5. GROUP LIST MANAGEMENT ..................................................................... 25
6. GROUP MANAGEMENT ............................................................................ 32
7. CHAT MANAGEMENT ............................................................................... 34
8. FILE TRANSFER .......................................................................................... 43
9. COMMUNITIES MANAGEMENT ................................................................ 45
10. STREAM VIEWER .................................................................................... 58
11. GAME INTEGRATION .............................................................................. 65
12. LEAGUE OF LEGENDS INTEGRATION ....................................................... 73
13. MOBILE PAIRING WITH THE RAZER COMMS APP.................................... 78
14. CLIENT ADMINISTRATION ....................................................................... 80
15. LEGALESE ................................................................................................ 83

3 | razer
1. SYSTEM REQUIREMENTS
Windows® 10 / Windows® 8.1 / Windows® 8 / Windows® 7 / Windows Vista®
Internet connection
At least 75MB of free hard disk space
Disclaimer: All features listed in this Master Guide are subject to change based on the current software
version.
2. INSTALLATION
INSTALLING THE CLIENT
Razer Comms is a standalone client that can be downloaded and installed into your PC.
Step 1. Visit www.razerzone.com/comms to download the latest version of the Razer
Comms client installer.
Step 2. Launch the downloaded installer.
Step 3. Follow the onscreen instructions to complete the installation.
Step 4. Click Done once the installation completes and restart your computer when
prompted.

4 | For gamers. by gamers.™
UPDATING THE CLIENT
Razer Comms automatically checks for version upgrades. A software update manager
will appear when an upgrade is available.
Click INSTALL to begin the download and installation.
UNINSTALLING THE CLIENT
If you have a previously installed version of the Razer Comms client or if you wish to
completely uninstall the client,
Step 1. From the Windows Start menu, go to your Control Panel and select
Programs > Uninstall a program.
Step 2. Right-click on the Razer Comms entry in the list and select Uninstall.
Step 3. Follow the onscreen instructions to complete the uninstallation.
Step 4. Restart your computer when prompted.

5 | razer
3. ACCOUNT MANAGEMENT
CREATING AN ACCOUNT
You can login to the Razer Comms directly using your Razer Synapse 2.0 login details. If
you are not an existing Razer Synapse 2.0 user, register as follows:
Step 1. Launch the Razer Comms client from the Start menu.
Step 2. Click CREATE ACCOUNT at the bottom of the client.
Step 3. Enter a valid Email address.
Step 4. Enter your Nickname, Comms ID and Password. Re-enter your Password for
confirmation.
Note: Your Nickname should be at least 3 characters. Comms ID cannot be changed once the
account is created.
Step 5. Click the links to read the Terms of Use and Privacy Policy. Check the “I have
agreed to the Terms of Use and Privacy Policy” box if you agree to be bound
by the terms stated.

6 | For gamers. by gamers.™
Step 6. Click CREATE.
Step 7. Check your email inbox for an account verification email from Razer.
Step 8. Verify your Razer Synapse 2.0 account by clicking on the link in the email.
Step 9. Return to the Razer Comms client and login using your registered account.
LOGGING IN
If you already have an existing Razer Synapse account, login directly to Razer Comms as
follows:
Step 1. Launch the Razer Comms client from the Start menu.
Step 2. Enter the Email address and Password of your existing Razer Synapse
account.
Step 3. Check the Stay logged in box ONLY IF you wish to automatically login to
Razer Comms using this account each time you launch the client.
Step 4. Click LOG IN.

7 | razer
LOGGING OFF
Log off from the Razer Comms client by clicking your display name from the Razer
Comms main window and select LOG OFF.
RETRIEVING YOUR PASSWORD
If you have forgotten your account password,
Step 1. Click Forgot Password? on the login interface of the client. Your web browser
will launch and direct you to Razer’s Password Reset Request page:
Step 2. Enter your registered account EMAIL and type the image verification code
shown. Then click SUBMIT.

8 | For gamers. by gamers.™
Step 3. Check your email inbox for a verification email from Razer. Click the link in
the email.
Step 4. Your web browser will navigate to the password reset page as shown in the
figure below. Enter your NEW PASSWORD and retype it to confirm. Then
click SUBMIT.
A success screen will be displayed. You can now login to Razer Comms using this new
password.

9 | razer
CHANGING YOUR PASSWORD
For security purposes, you are recommended to change your account password
regularly. To change your account password through the Razer Comms client,
Step 1. Launch the client and login to Razer Comms.
Step 2. From the Razer Comms interface, click your display name to bring up a list of
menu options. Select CHANGE PASSWORD.

10 | For gamers. by gamers.™
Step 3. In the next screen, enter your Current Password, and the New Password. Re-
enter the new password then click APPLY to confirm the change.
11 | razer
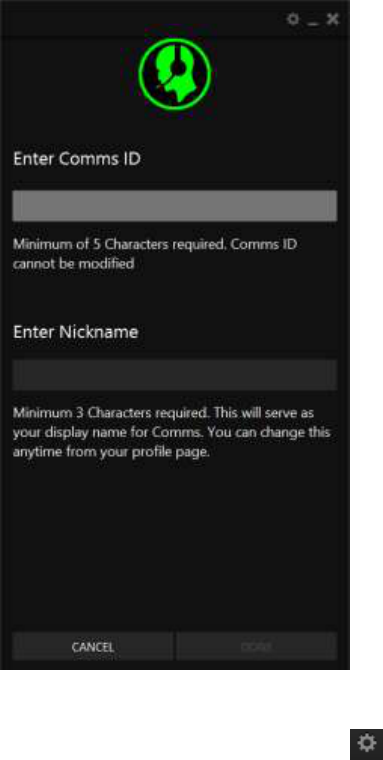
MANAGING YOUR USER PROFILE
You can edit your account profile from the Razer Comms interface. If you did not
specify a Nickname and/or Comms ID when creating your account, this interface will
automatically open when you first log into the client.
Step 1. Launch the client and login.
Step 2. From the top right corner of the client, click the icon or click your display
name and select EDIT PROFILE.
Step 3. Click the PROFILE tab.

12 | For gamers. by gamers.™
Step 4. You must specify a Nickname for your account. All other information is
optional. You can use the button to specify whether the
corresponding information is available for Public viewing, Friends only or
Private. Profile details can include:
Avatar: Change your display picture. Click the avatar, choose an image file
and crop it to your preferred area. Click SAVE to confirm the selection
Personal details including actual name, date of birth, age and gender
Location details including language, city and country
Note: Changes to your Nickname will only be reflected on your friends’ client the next time they log in. Your
Nickname should be at least 3 characters.

13 | razer
SETTING YOUR ONLINE STATUS
You can manually adjust your online status by clicking on your display name and
choosing from the list of available statuses.
Note: Your status automatically changes to AWAY when there is no activity on the PC for 5 minutes and audio is
not enabled.

14 | For gamers. by gamers.™
CONFIGURING GENERAL PREFERENCES
Razer Comms provides a number of general preferences to manage the client’s
behavior.
Step 1. Launch the client and login.
Step 2. From the top right corner of the client, click the icon.
Step 3. Click the GENERAL tab.
Step 4. Check the options you wish to enable and uncheck those you wish to disable.
Step 5. Click OK to save the changes.
Note: You can click DEFAULTS to return to the default software setting.

15 | razer
MANAGING NOTIFICATIONS
All requests requiring action from you will be listed in your pending notification list. A 5
second notification pop up will also appear on the bottom right corner of your screen if
you were logged into Razer Comms when the notification was made. Notifications
include the following:
Friends come online
Friends start playing online
Friends start watching a stream
A stream goes live
Incoming chat messages received
Incoming voice call requests
Incoming group chat messages received
Request messages
To manage your notification list:
Step 1. Login to the Razer Comms.
Step 2. The notification list icon is normally unlit. If you have pending
notifications, this icon will be lit in green, such as: .
Step 3. Click this icon to view your notification list.

16 | For gamers. by gamers.™
Step 4. Click to accept the request or to cancel the notification. Clicking
will block the user from further sending the same request.

17 | razer
4. FRIEND LIST MANAGEMENT
There are multiple ways to add friends to your Friend List. You can use the Find Friend
function, Invite non-users to download the Razer Comms client, add a member of a
group or group chat, and accepting friend requests.
ADDING FRIENDS – FIND FRIEND FUNCTION
Step 1. Login to Razer Comms to view your Friend List. From the bottom of the client,
click ADD FRIENDS.
Step 2. A new window will appear where you can search for a friend via his:
Razer Comms nickname (Partial match)
Real name (if specified in his user account profile)
Razer ID (Full match)
Email (Full match)

18 | For gamers. by gamers.™
Step 3. A list of matches will be displayed
Step 4. Click to add the corresponding user. Your friend will receive a friend
request notification. You will be able to view this friend’s online status only
after he accepts the request.
ADDING FRIENDS – ACCEPTING FRIEND REQUESTS
Friends can also initiate add requests. All friend requests received will be listed in your
pending notifications list until you accept or reject the request. Please refer to
MANAGING NOTIFICATIONS for details on managing your pending notifications list.

19 | razer
ADDING FRIENDS – INVITING FRIENDS INTO THE RAZER COMMS FAMILY
If your friend is not currently a Razer Comms user, you can send him an invite via
Facebook
Direct email
DIRECT EMAIL
Step 1. Login to Razer Comms to view your Friend List. From the bottom of the client,
click ADD FRIENDS.
Step 2. From this new window, click INVITE FRIENDS TO JOIN COMMS.
Step 3. Enter the email address and the name of the friend you want to invite. You
can invite up to 3 friends each time using the ADD MORE link.
Note: You can click to remove an email address from the list.

20 | For gamers. by gamers.™
Step 4. Click SEND. Your friends will receive an email containing a download link.
Simply ask them to click the link to begin downloading the client.

21 | razer
ADDING FRIENDS – ADDING FROM A GROUP MEMBER LIST
Members of a group you joined who are not your friends will have an icon next to
their name. Simply click this button to send a friend request to that user.
ADDING FRIENDS – ADDING FROM A GROUP CHAT
If there are participants in a group chat you want to add to your personal Friend List,
simply:
Step 1. Click next to the user you wish to add. A friend request will be sent to this
user.
Step 2. This user will be added to your Friend List with an “INVITE PENDING” status.

22 | For gamers. by gamers.™
MANAGING YOUR FRIEND LIST
Aside from adding friends, you can also perform various other operations on your
friends in the list. Simply right-click on your friend’s nickname to view the list of
options:
Available options include:
Chat: Open a chat window with your friend.
Call: Start a voice chat with your friend.
View Profile: View your friend’s profile.
Rename: Change your friend’s display name on your client only. This does not
overwrite the nickname chosen by your friend.
Add to / Remove From Favorites: Add/remove your friend to/from a favorite list.
Friends you chat with more often can be added to this list for easier access.
Remove from Friends: Remove a friend completely from your Razer Comms list.
You will be removed from his Friend List as well.

23 | razer
Block Friend / Unblock Friend: Block/Unblock a friend from your list. Blocked
user will not be able to see your online status and private profiles. Requests and
notifications from this user will also be blocked.
BLOCKING USERS
Blocking users prevents them from seeing your online status, private profile
information, sending you requests etc. You can block users in several ways:
1. Blocking users who are already in your Friend List
From your Friend List, right-click on the friend you wish to block. Select “Block
Friend”.
Blocked users will be shifted to the bottom of your Friend List with an indicator
added.
2. Blocking users by searching the global Razer Comms user list
Click . Select the PRIVACY tab.

24 | For gamers. by gamers.™
Here you can:
Allow friends to see what you are currently playing
Allow friends to see what you are currently watching
Block all incoming friend requests
Select users from your Friend List to block
The list on the left shows all users on your Friend List. Click to search for a
specific friend in the list. Click to block the selected friend. This moves
the user to the blocked list on the right.
Unblock a user.
Select the user/friend from the Block list on the right. Click to
unblock the selected user.

25 | razer
5. GROUP LIST MANAGEMENT
Razer Comms organizes all groups into its own tab for simple management. Click the
tab to view your list of groups.
From this interface you can:
Sort the group list according to:
A-Z – Alphabetical order
MOST RECENT – The group you last interacted with will be displayed on top.
Group interaction includes group add or chat actions.
View the list of members in a group by clicking on the group name.
Open the group chat window by double-clicking on the group name.
26 | For gamers. by gamers.™
As a member of a group, right-clicking on it presents you with various options,
including:
Opening the chat window for the group
Leave the group
View the group profile. This includes information on the group that is publicly
available including member names, number of members, date of creation, etc.
Add friends as member of the group. This option is available if the group was set
up to allow non-administrators to add members into the group.
Block the group. This removes your member status from the group completely.
The group will be removed from your group list and added to the blocked list.
Hide taskbar text alert. When this is hidden, Razer Comms will not send popup
notifications when a text message is received from chat channels belonging to
this group. A chat notification will still be sent to your notification list. Simply
click to view this notification and join the chat.
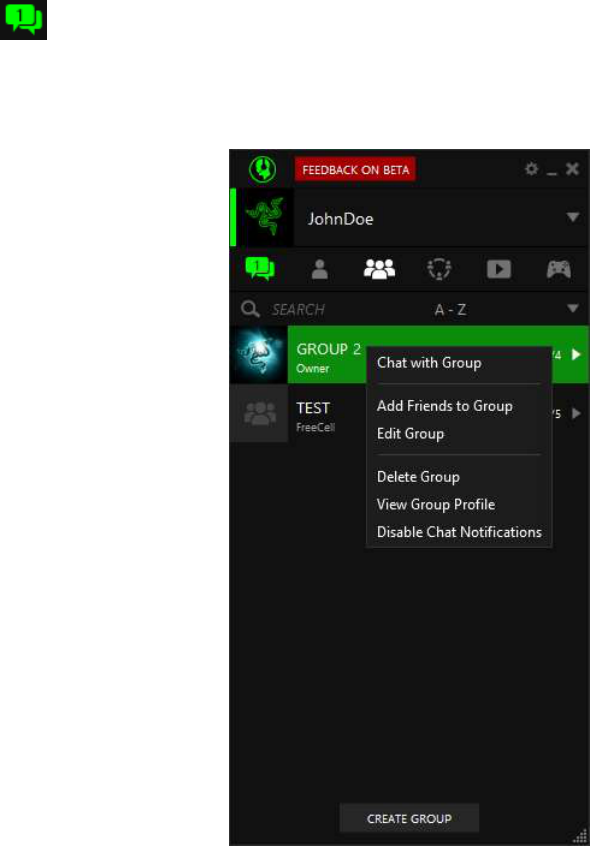
If you are the creator of the group, you can also perform the following operations:

27 | razer
Chat with Group – Open the chat window for this group.
Add Friends to Group – Add your friends to the group.
Edit Group – This includes changing the group name, adding friends to the group
and allowing members to add their own friends to the group.
Delete Group – Delete a group
View the group profile – This includes information on the group that is publicly
available including member names, number of members, date of creation, etc.
Disable Chat Notifications – When disabled, Razer Comms will not send popup
notifications or flash on your taskbar when a chat message is received from chat
channels belonging to this group. A chat notification will still be sent to your
notification list. Simply click to view this notification and join the chat.
Note: Members who are online will need to re-login to see any changes in the group’s name.
ADDING GROUPS – CREATING YOUR OWN PERMANENT GROUPS
A permanent group helps to organize your friends into cliques, game buddies etc. This
allows you to initiate chat with all members of the same group without having to
separately invite each one every time.
To create a permanent group, please refer to CREATING A GROUP.
ADDING GROUPS – SAVING MEMBERS OF AN AD-HOC CHAT INTO A GROUP
Before exiting a group chat, you may wish to save all members into a permanent group.
This lets you re-initiate a group chat in the future without having to re-add each
member individually.
Note: You must be the initiator of the group chat to create the group.
Step 1. Click on the top right corner of the chat window to close the chat. The
following prompt will display.
Note: This prompt will not be displayed if you had previously checked the Do not show this reminder again
checkbox. To re-enable this function, click to view the PREFERENCES window and check the Create group
from ad-hoc chat checkbox in the CHAT tab.

28 | For gamers. by gamers.™
Step 2. Click OK. The CREATE GROUP window will display.
Step 3. Specify the group details accordingly and click DONE.
Note: For information on specifying group details, please refer to ADDING GROUPS – CREATING YOUR OWN
PERMANENT GROUPS.
A group invite notification will be sent to all members of the chat. Users who accept
this invite will then be added to this group.
ADDING GROUPS – ACCEPTING GROUP INVITES
Friends can also invite you to groups they created. All requests received will be listed in
your pending notifications list until you accept or reject the request. Please refer to
MANAGING NOTIFICATIONS for details on managing your pending notifications list.

29 | razer
LEAVING A GROUP
Step 1. From your group list tab, right-click on the group you wish to leave.
Step 2. Select Leave Group.
Note: You can also leave a group from its chat channel window using the button
Step 3. A confirmation prompt will pop up. Click OK to confirm you wish to leave the
group.
Note: The group creator cannot leave the group.

30 | For gamers. by gamers.™
BLOCKING GROUPS
Blocking groups removes the group from your group list. You will no longer be a
member of that group.
To rejoin a group, you will need to first unblock this group.
Note: You cannot block a group if you are the group’s owner.
1. Blocking groups that are present in your group list
From your Friend List, right-click on the group you wish to block. Select “Block
Group”. Blocked groups will be removed from your group list.
2. Blocking users by searching the global Razer Comms group list
Click . Select the PRIVACY tab.
Change the tab to .

31 | razer
Here you can:
Select groups from your group list to block.
The list on the left shows all groups on your group list. Click to search for a
specific group in the list. Click to block the selected group.
This moves the group to the blocked list on the right and also removes you from
the group.
Unblock a group.
Select the group from the Block list on the right. Click to unblock the
selected group.
Note: Unblocking a group does not automatically make you a member of that group.

32 | For gamers. by gamers.™
6. GROUP MANAGEMENT
CREATING A GROUP
Step 1. From your Razer Comms client, click to view your group list.
Step 2. Click .
Step 3. Enter your group Name.
Step 4. (Optional) Edit your group avatar. Double-click on the current avatar image
and select and choose an image file to be used and crop it to the desired size.
Click Save to save the avatar.
Step 5. Click to invite members to your group.
Step 6. An ADD FRIEND window will pop up displaying all your friends in the Friend
List. Check the checkbox next to the friend(s) you wish to add to the group.

33 | razer
All selected friends will move from the ADD FRIEND window to the group list,
with an “INVITE PENDING” displayed under their name. Your friend(s) will
receive a group invite notification which they must then accept or reject.
Note: Only the group creator can add members into a group. Friends who are already members of the group
will not be listed.
Step 7. This group will also be added to all members’ group list once they accept the
invite.
Step 8. (Optional) Allow any existing member to invite new members to the group.
Step 9. Click DONE to create the new group.
Your friends will then receive a group invite notification. He will be added to the group
once he accepts this invitation.

34 | For gamers. by gamers.™
7. CHAT MANAGEMENT
SETTING UP YOUR MICROPHONE AND SPEAKER
Step 1. Click on from your Razer Comms window to display the settings window.
Step 2. Select the AUDIO tab.
Step 3. Select the correct Microphone and Speaker devices to be used for voice
chats on Razer Comms.
Step 4. Test your Microphone selection by speaking into your microphone. A green
bar should move while you are speaking.
Step 5. Test your Speaker by sliding the Volume bar. When you release the slider,
you should hear a “POP” sound which also reflects the speaker volume.

35 | razer
Step 6. Click START AUDIO TEST to initiate a microphone test. A new chat window
will open, connecting you with Razer Comms Echo/Sound Test Service.
Simply follow the instructions given by the audio prompt to complete the
test.
Step 7. Click OK to save your selection.
Note: You can customize the pickup threshold of your microphone. This will allow you to set your
microphone to only pickup voice input that is above that volume level. Simply set your Microphone
activation method to “Off” or “Toggle Mic on/Mic Mute”. Then, uncheck the Automatically adjust
minimum volume option and adjust the threshold via the slider bar above.

36 | For gamers. by gamers.™
CONFIGURING YOUR CHAT PREFERENCES
Step 1. Click on from your Razer Comms window to display the settings window.
Step 2. Select the GENERAL tab.

37 | razer
Step 3. Setup the chat preferences as desired. The options include:
Chat Colors– Assign the display color of nicknames and text messages in
chat windows
Clear chat history –Click to delete all saved chat history.
Create group from ad-hoc chat – Check this option to allow the client to
prompt you to create a group when you end an ad-hoc group chat.
Automatically accept incoming chat – Check this option to allow Razer
Comms to accept incoming chat requests automatically.
Open chat in tabs instead of new windows – Check this option to open
different chat channels/rooms using tabs within the same window.
Warn when closing multiple chat tabs – Check this option to see a
warning prompt whenever you attempt to close a chat window containing
multiple chat tabs.
Save received files in – Click to select a destination folder
for all files transfers.
Step 4. Click to close the settings window.
STARTING A 1-TO-1 CHAT WITH A FRIEND
Step 1. Initiate a text chat with a friend on your Friend List by:
Double-clicking the name of your friend
Right-clicking the name of your friend and select Chat. This can be
performed from both your Friend List or from a group chat window.
Step 2. A chat window will open. Type and send your message. You can also choose
to include emoticons or drag and drop files to send as attachments to the
chat window.
Step 3. A message received notification will be sent to your friend. His chat window
will open when he clicks this notification.

38 | For gamers. by gamers.™
Note: If your friend was offline at the time of the message, a message received notification will be sent to his
notification list. He can view this message when he next logs in.
CHATTING WITH GROUPS
Chatting with members of groups you are a part of is done via the group chat. To chat
with a particular group,
Step 1. Click on the Group list.
Step 2. Right-click on the group you wish to chat with and select “Chat with Group”
or double-click the group name.
Step 3. All members will be added into the group chat window. From this window,
members can:
Send and receive text messages
Send and receive emoticons
Drag and drop files to send as attachments
Enable voice chatting by clicking the button
Start a private chat with the group admin or another group member
Add a member to you friends list
View profiles
Leave the group
All group owners can also:
Remove a user from the group.

39 | razer
CREATING AN AD-HOC CHAT WITH SELECTED MEMBERS OF A GROUP
For large groups, chat channels may get overcrowded, making it difficult for some
members to chat among themselves. Aside from requesting to a group administrator,
these members can set up a private ad-hoc chat and invite people they wish to chat
with privately.
Step 1. Enter the group’s chat channel.
Step 2. Right-click on one of the members you want to chat with
Step 3. Click CHAT which will open a new window
Step 4. Click ADD FRIENDS from the bottom of the chat window.
CHANGING A TEXT CHAT TO A VOICE CHAT
Whether you are in a 1-to-1 chat or a group chat, initiating a voice chat with your
friends requires only a single click.
Step 1. To start a voice chat with all participants of the chat, click in the chat
window above your name.
Step 2. For ad-hoc group chats or 1-to-1 chats, a voice chat notification will be sent
to all participants of the chat. For permanent group chats, no notification is
sent when a member enables voice chatting.
Step 3. A voice chat notification will be sent to your friend. Various icons will appear
on your chat window once you initiated a voice chat.

40 | For gamers. by gamers.™
This includes:
– Indicates that audio is enabled for that user.
– Indicates that the user has a working microphone connected.
– Indicates that the user is currently speaking.
– Indicates the quality of the voice connection to the server is bad or
cannot be established.
Step 4. When new participants are added to the chat while voice chat is active,
simply right-click on their names and select Start Voice to send them a voice
chat request.
Step 5. Stop voice chatting by clicking the icon.
You can only have 1 voice chat session active at any time. Starting a new voice chat
session will terminate the currently active session. You will need to re-initiate voice
chat on a previous session to resume voice chatting.
MUTING AND ADJUSTING VOLUME IN A VOICE CHAT
There are various mechanisms to adjust speaker and microphone volume during a chat.
To mute your microphone, simply click the icon next to your name on the
chat list or click the icon on the chat window. Your microphone icon will
change to . Click the icon to unmute your microphone.
To mute your speaker, simply click the icon on the chat window. Click to
unmute your speaker.
To adjust the volume of your microphone, simply click you name on the chat list
and use the dropdown volume slider.
To adjust the volume of a participant in a chat, click their name on the chat list
and use the dropdown volume slider.

41 | razer
VIEWING CHAT HISTORY
Disclaimer: Chat history is saved on the server and can be viewed from any PC once you
successfully login to Razer Comms on that PC. For security purposes, please ensure that
you logout of every Razer Comms session and only allow Automatic sign-in on trusted
devices.
To view the chat history for a 1-to-1 chat or permanent group chat,
Step 1. Open the chat window for that friend or group.
Step 2. Click

42 | For gamers. by gamers.™
CLEARING CHAT HISTORY
To clear the chat history for a 1-to-1 chat or permanent group chat,
Step 1. Open the chat window for that friend or group.
Step 2. Click .
Step 3. Select CLEAR HISTORY.
Note: Only the group creator is able to clear history for group chats.
You can also clear all saved chat history as follows,
Step 1. Click to open the PREFERENCES window.
Step 2. Select the GENERAL tab.
Step 3. Click .

43 | razer
8. FILE TRANSFER
Using Razer Comms, you can easily transfer files between friends and members of
groups you are a part of.
Note: File transfer can only be carried out if both sender and receivers are online. Group members that are
offline when the transfer was initiated will not receive any file transfer request.
SPECIFYING THE DEFAULT LOCATION TO SAVE RECEIVED FILES
Select the default folder to save files received over Razer Comms to from the General
preferences window. Click and select the GENERAL tab.
Click Browse to change the default folder. Then click OK to confirm.

44 | For gamers. by gamers.™
TRANSFERRING FILES TO FRIENDS/GROUP MEMBERS
Step 1. Initiate a chat with your friend or group channel. From the chat window, click
the icon.
Step 2. Your standard windows explorer browser will appear. Select the file you wish
to send.
Note: You can also drag the file you wish to send into the chat window to initiate the file transfer.
Step 3. Once your friend accepts the transfer request, file transfer will begin. Please
wait till the transfer completes before logging out from Razer Comms.
Note: File transfer will be aborted if either party logs off during the process. You can close the chat window
during a file transfer. A notification will be received to indicate that the transfer has completed if the chat
window was closed.

45 | razer
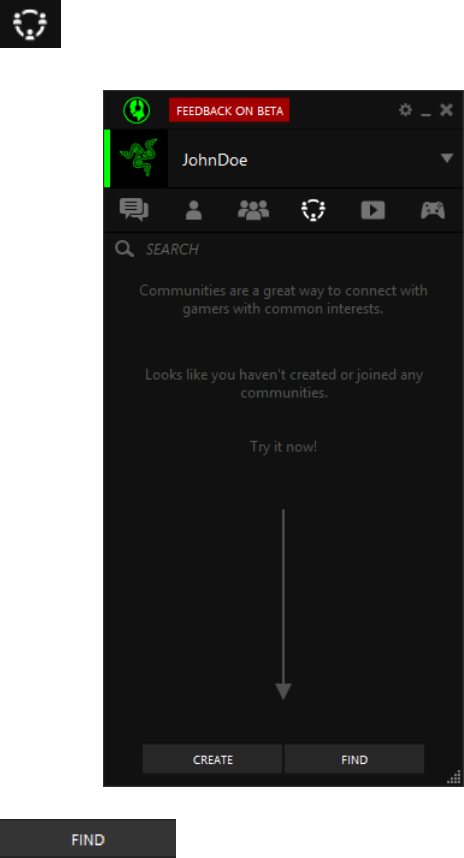
9. COMMUNITIES MANAGEMENT
The Communities Management Tab is a great way to connect with gamers with
common interests. The Communities Tab is also available as an in-game overlay. Click
the tab to open the Communities Management Tab.
From this interface you can:
Create a community
Find a community
Search your communities and communities you follow

46 | For gamers. by gamers.™
CREATING A COMMUNITY
Creating a community allows you to build a virtual chatroom where people with similar
interests such as yourself can join and be part of the conversation. Unlike group chat,
the community chat can accommodate more users and may not require users to be in
your friends list to join the community. To create a community,
Step 1. Click the icon on the Comms client.
Step 2. Click the icon.

47 | razer
Step 3. Assign a name for your community and use the button to choose if you want
your community to be searcheable by the public or by invitation only.
Step 4. Select if you want to protect your community by adding a password. Only
users who know the password can join the community.
Step 5. Add a short description for your community and select a game or games you
want to associate with your community.
Step 6. Add a community icon using the button and
browse for an image file to upload.

48 | For gamers. by gamers.™
Step 7. Add a community banner using the button.
You can either select a solid color or upload a file as your banner.
Step 8. Select a font color for the community name.
Step 9. Click the icon when you are finished customizing your
community.

49 | razer
COMMUNITY ADMIN
When you click on the community you created, it will launch the Community Admin
window. Admins will have a different chat color when posting on the community.
From the Community Admin window you can:
Search for a particular member of the community using the icon
Locate yourself from the members list using the icon
Locate Community Admins using the icon
Enable voice chat using the icon
Mute yourself using the icon
Add new channels using the icon
Change community settings such as admin rights using the icon
Post an announcement using the icon. This announcement will be shown on
all channels in the community.
Post a topic / status of the day message for the channel by clicking on the text
box beside the lobby name. This message will always be shown on the top of the
channel chat window.

50 | For gamers. by gamers.™
Invite friends to the community using the icon
Hide the member’s list using the icon
Insert emoticons using the icon
Chat with other Comms users on the channel
Rearrange channels via drag and drop
Place members into a specific channel via drag and drop
Right-clicking on a channel will open additional options such as:
Edit the channel’s properties
Edit the welcome message for the channel
Add a sub channel
Delete the selected channel
Share a stream by adding the link or searching for the specific video
Right-clicking on a user will open additional options such as:
View the user’s profile
Change a user’s role to either a member or an admin
Kick the user from the community
Ban the user from the community

51 | razer
From the Channel Properties window you can:
Rename the channel
Post a channel status or topic
Create a welcome message
Set a password protection
Activate or deactivate voice chat
Activate or deactivate text chat
Enable or disable spam protection

52 | For gamers. by gamers.™
COMMUNITY SETTINGS
When you click the icon, it will launch the community settings window.
From the Community Settings window you can access the following tabs and their
corresponding functions:
1. Profile tab
Enable receiving notifications
Enable auto-launching the community
2. Properties tab
Change the community name
Change the access type to public or private
Add password protection or change the password
Specify the scope of games
Invite friends
Copy the community link
Delete the community
53 | razer
3. Admin Rights tab
Enable voice and text chat moderation for a channel
Create/edit/delete channels or subchannels
Ban users from the community
Define admin rights for the community
Edit the community properties
4. Member List tab
Promote to admin or ban the member
5. Ban List tab
Reinstate community access to a user
6. Community Chat Widget tab
Preview or copy a chat widget for your website
54 | For gamers. by gamers.™
JOINING A COMMUNITY
Joining a community allows you to discover people with similar interests such as
yourself and take part on their conversations. Unlike group chat, the community chat
can accommodate more users and may not require users to be in your friends list to
join the community. To find a community,
Step 1. Click the icon on the Comms client.
Step 2. Click the icon.
55 | razer
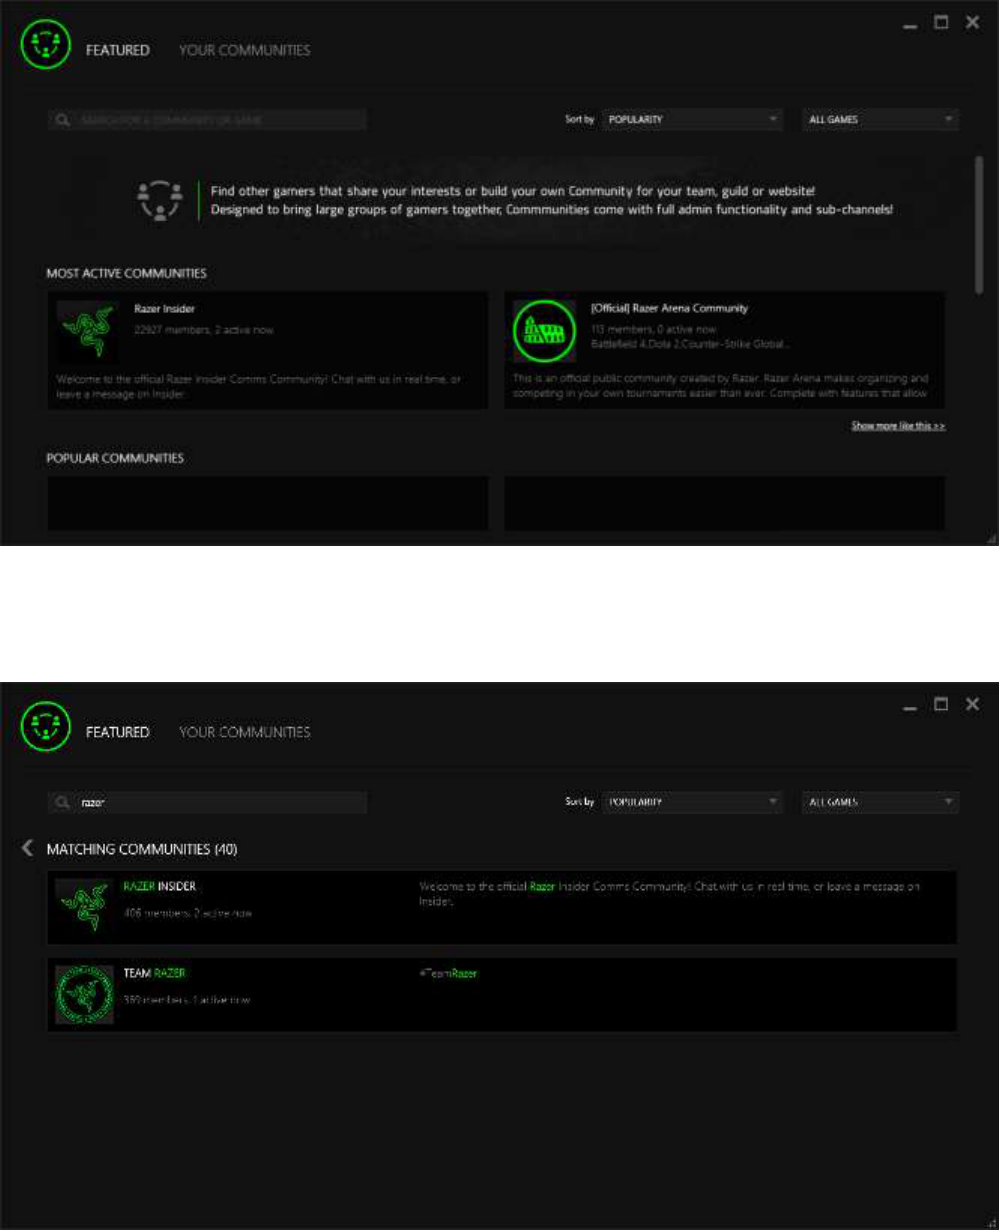
Step 3. Click on the popular or recommended communities you want to join.
Step 4. You can also use the search bar to find a specific community then select
from a list the community you want to join.

56 | For gamers. by gamers.™
Step 5. If the community is not password protected, you will immediately join the
community and Comms will automatically add it to your list of communities.
If the community is password protected, you will need to type the password
on the given field.
COMMUNITY MEMBER WINDOW
When you click on the community you joined, it will launch the community window.

57 | razer
From the Community Window you can:
Search for a particular member of the community using the icon
Locate yourself from the members list using the icon
Locate Community Admins using the icon
Enable voice chat using the icon
Mute yourself using the icon
Access community settings such as the community profile using the icon
Invite friends to the community using the icon
Hide the member’s list using the icon
Insert emoticons using the icon
Chat with other Comms users on the channel
Right-clicking on a user will open additional options such as:
View the user’s profile
58 | For gamers. by gamers.™
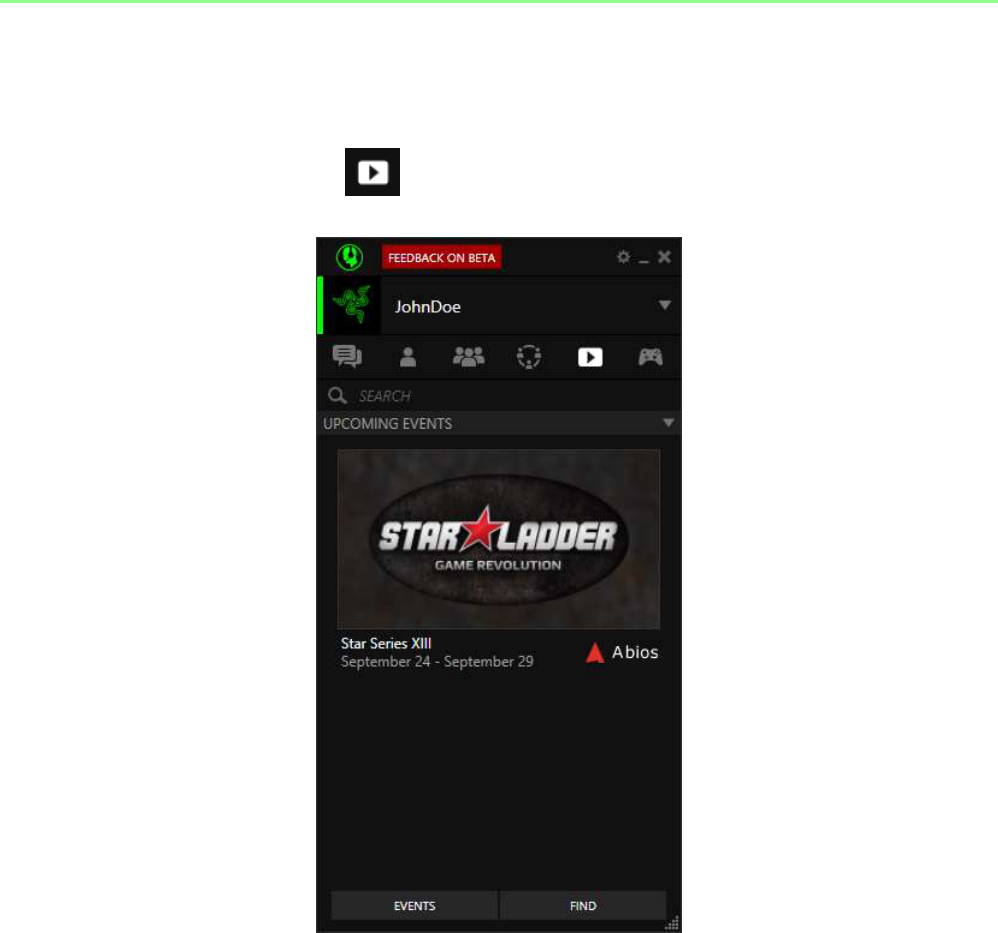
10. STREAM VIEWER
Stream Viewer is an innovative feature of Razer Comms that allows you to watch and
share video streams. Click the tab to open the Stream Management Tab.
From this interface you can:
1. Launch the discovery window
2. View upcoming events
3. Search your following streams
4. Find a specific stream

59 | razer
DISCOVERY WINDOW
When you click Find it will launch the discovery window.
Streams
The STREAMS tab is the default tab whenever you open the discovery window and
allows you to navigate between the Featured, All Games, and Events tabs.
From the FEATURED tab you can:
1. Search for a particular streamer, game, or stream
2. Launch the stream viewer
3. View featured streams
4. View popular streams
You can use the VIEW dropdown menus to filter the results according to streaming
services, and game.

60 | For gamers. by gamers.™
From the ALL GAMES tab you can:
1. View all streams based on a game
2. Search for a game

61 | razer
From the EVENTS tab you can:
1. View all streams based on tournaments
2. View the schedule for all events on a daily basis
You can use the dropdown menu to filter the results according to a specific game.

62 | For gamers. by gamers.™
Following
The FOLLOWING tab allows you to view all the streams you are currently following.
From this tab you can:
1. Search for a particular streamer, game, or stream
2. Launch the stream viewer
3. Unfollow streams
You can use the VIEW dropdown menus to filter the results according to streaming
services, and game.
63 | razer
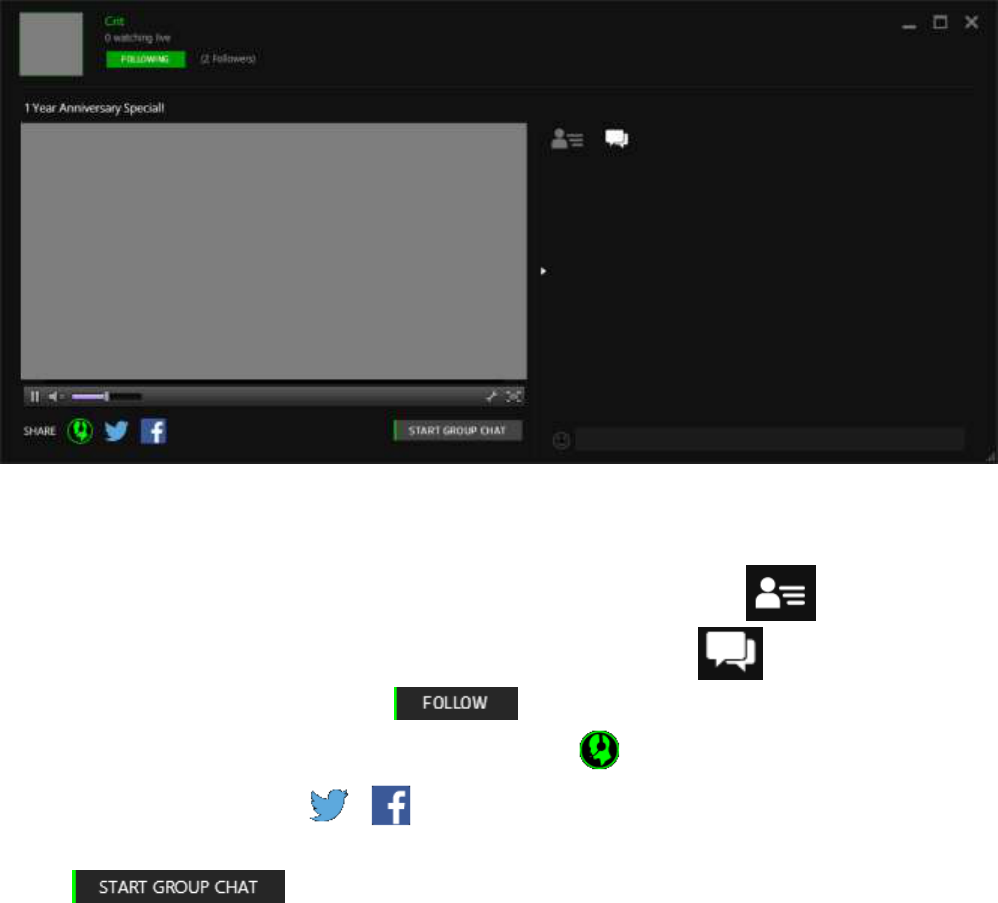
When you click on a stream from the discovery window, it will launch the stream
viewer. You can launch multiple stream viewers at the same time.
From the stream viewer you can:
1. Watch a stream
2. Discover people watching the stream on Comms using the tab.
3. Chat with other Comms users on the stream using the tab.
4. Follow the stream using the button.
5. Share the stream to your friends using the button or to other social media
services using these buttons.
6. Create a group chat and switch to a mini stream viewer using the
button.

64 | For gamers. by gamers.™
Mini Stream Viewer
From the stream viewer, create a group chat by pressing the button,
selecting your friends, and choosing the option to close the current stream and embed
the stream in group chat.
Once you have created the group, the mini stream viewer will appear beside the group
chat window.

65 | razer
11. GAME INTEGRATION
A unique feature of Razer Comms lies in its ability to be overlayed in your gaming
window. Designed with gamers in mind, you can now play your game on full screen
without worrying about missing messages from your friends.
MANAGING YOUR GAME LIST
You can view your list of games from the Games list tab ( ). The game list is sorted
as follows:
A-Z: All games added to Razer Comms are sorted in alphabetical order.
Most Recent: Sort the games list in order of the latest game played and/or
added (manually or scanned).
To add a game to this list, either:
Click SCAN. Razer Comms will scan your system for any installed games with
overlay support and add them to the game list.
Click ADD. A file browser window will display. Select the game launcher to be
added to the list.
You can manage a game on the list by right-clicking the game to view the options
menu. You can:
Launch the game.
Edit game properties including enable/disable Razer Comms overlay for this
game, show/hide playing notification from friends, renaming the game and
specifying additional launch parameters. Note: Games with the “Hide currently
playing notification” option selected will be hidden from your profile when
viewed by other users. Your friends will not be sent a notification when you
launch the game.
Add/remove the game to/from the Favorites list.
Hide / Show the game from/on the list.
SETTING IN-GAME OVERLAY
Razer Comms supports overlay for games that are in the master game list (can be
updated from the server) and are DirectX games. This function anchors the Razer
Comms client into your game screen while it is active. You can chat with friends, be
notified when friends come online and more without ever taking your eyes off your
game.

66 | For gamers. by gamers.™
Step 1. Ensure that global overlay is enabled. Click and select the IN-GAME tab.
Switch the In-game option to ON.
Note: Disabling overlay globally will disable overlay for all supported games regardless of their
individual overlay settings. Enabling/disabling overlay for games individually will only take effect when
global overlay is enabled.
Step 2. Using the Overlay transparency slider, adjust the level of transparency for
the Razer Comms client when it is displayed in game. This affects only the
client behavior while in a game window. You can click and hold the slider to
check your transparency setting.

67 | razer
Step 3. Go to the Games list tab ( ).
Step 4. Right-click a game and select EDIT GAME.

68 | For gamers. by gamers.™
Step 5. Check the Enable Overlay option and click UPDATE.
Overlay is turned on by default for games listed in the supported games list and turned off
otherwise. Note that turning overlay on for a game that is not using DirectX will have no
effect. When overlay is turned on, the main client window will be displayed (active) by
default on the game screen. To toggle the display off (inactive), use the default shortcut
key <CTRL + TAB>.
DISPLAYING / HIDING RAZER COMMS IN-GAME OVERLAY
The Comms Panel can be shown / hidden easily using the Show/Hide In-game Overlay
Hotkey (Default: Ctrl+Shift).
When you launch a game, the Comms Panel will be visible and it will be in an active
state wherein you can use the in-game overlay and chat with your friends. Pressing the
Clickable/Non-clickable In-game Overlay Hotkey (Default: CTRL + TAB) will put the
Comms Panel in an inactive state wherein you cannot interact with the in-game
overlay.

69 | razer
Note: You can still use voice chat and view text messages even if the Comms Panel is inactive.
If the shortcut key conflicts with one of your game’s key bindings, you can rebind the
hotkeys as follows:
Step 1. Click on from your Razer Comms window.
Step 2. Select the IN-GAME tab.
Step 3. Click the textbox adjacent to the conflicting hotkey and type a new key or key
combination you wish to bind to this function.

70 | For gamers. by gamers.™
COMMS PANEL
Quickly access your friends and groups via the Comms Panel. Simply drag and
reposition the panel if you want it in a different location. The panel automatically snaps
to the edge of your screen for a clean gaming experience.
All active chats are readily accessible by clicking the notification icon ( ).
COMMS DASHBOARD
Clicking the notification icon ( ) will display the Comms Dashboard. The notification
icon also keeps you informed of any unread messages.
You can launch Comms by clicking the ( ) icon. Adjust transparency of the
overlay by clicking the slider icon ( ).

71 | razer
FRIENDS AND GROUP CHAT OVERLAY
Quickly start a chat with your friends and groups using the Comms Dashboard. From
the in-game chat you can:
Start or stop a voice call by clicking the ( ) icon
Adjust the speaker volume using the ( ) icon
Mute your mic using the ( ) icon
View the users participating on the chat using the ( ) icon
Read and reply to messages using the chat bar
COMMUNITY PANEL
The Community Panel appears when you launch a community window.
Click the community profile picture to enable voice chat ( ). Click the community
profile picture again to mute the community voice chat ( ).Clicking the notification
icon ( ) will display the Community Chat Window. The notification icon also keeps
you informed of any unread messages.

72 | For gamers. by gamers.™
COMMUNITY CHAT OVERLAY
Quickly start a chat with your friends and groups using the community chat overlay.
From the in-game chat you can:
Enable voice chat using the icon
Mute the community by clicking the icon
Mute your mic using the icon
Show/Hide the users participating on the chat using the icon
Search for a particular member of the community using the icon
Locate yourself from the members list using the icon
Locate Community Admins using the icon
Chat with other Comms users on the channel using the chat bar

73 | razer
12. LEAGUE OF LEGENDS SUPPORT
Razer Comms integrates with the League of Legends (LoL), allowing LoL gamers easy
access to both their Razer Comms friends list and LoL player stats from a single
interface. This special interface lets you start a VoIP chat with all members of your
current team as long as they have Razer Comms installed.
Note: This feature is only available for the North America, Europe and Nordic LoL server regions.
To link your LoL account with Razer Comms, simply log into the game and accept the
prompt from the LoL Scouter.

74 | For gamers. by gamers.™
If the prompt does not appear, you will need to add your Summoner name and select a
region on the LoL Scouter. You may also select your Summoner from a list.

75 | razer
You can change Summoners on the LoL Scouter by clicking the button.

76 | For gamers. by gamers.™
Your Razer Comms and LoL account will remain linked until you manually remove your
LoL account by going to Preferences > Settings. Logging out your summoner will not
unlink your LoL account with Razer Comms. Razer Comms will not store your LoL
password. Hence, each time you log out of your LoL account, you will need to reenter
your log in details.

77 | razer
Once you have granted access to the summoner, the LoL Scouter will appear whenever
you start a LoL game. Whenever a match begins, the Razer Comms LoL Scouter window
will display the statistics of other players. This window is displayed as an overlay on the
LoL game client.
From this window, you can:
Minimize the overlay by clicking anywhere outside the window
Start a voice chat on Razer Comms
Join an existing voice chat session using a URL

78 | For gamers. by gamers.™
13. MOBILE PAIRING WITH THE RAZER COMMS APP
The Razer Comms App for mobile devices can be paired with Razer Comms on PC,
allowing you to receive notifications on your PC when you receive SMSs or mobile calls
on your paired mobile phone.
From this preference window on Razer Comms (PC version), you can:
Pair your mobile device to your PC. This function requires you to download and
log in with the same user account on the Razer Comms application on your
mobile device.
Select a default text message to be sent to the caller via SMS when you reject a
call via Razer Comms. Select from the list of default messages or click EDIT to add
your own custom message.
79 | razer
Enable notifications to be sent to Razer Comms (PC version) when a mobile call is
received on the paired mobile phone. Set up the hotkeys to decline/ignore the
call while in game.
Enable notifications to be sent to Razer Comms (PC version) when an SMS is
received on the paired device. Set up the hotkeys to reply/dismiss the message.
Append the message “sent from Razer Comms” on all SMS sent via Razer
Comms.

80 | For gamers. by gamers.™
14. CLIENT ADMINISTRATION
CHECKING YOUR CLIENT DETAILS
Step 1. Click on from your Razer Comms window to display the settings window.
Step 2. Select the ABOUT tab.
Aside from viewing version details about your client, you can also:
1. Click CHECK FOR UPDATES to check for a newer version of the client. Please refer
to UPDATING THE CLIENT for more information.
2. Click USER GUIDE to view details on how to use the client.
3. Change the Razer Comms UI display language by clicking the dropdown menu.

81 | razer
4. Click Terms of Service and/or Privacy Policy to view the various terms of use and
privacy policy agreements.
RESIZING YOUR CLIENT
You can resize all windows, even the overlay, on Comms. Simply click at the bottom
right corner of the window and drag the window to resize. You can click to minimize
the Razer Comms client to the taskbar.
CLOSING YOUR CLIENT
You can close the client completely by:
Right-clicking the Razer Comms client on the taskbar and select Quit Razer
Comms
Click your name on the client main window and select QUIT.
SUBMITTING FEEDBACK
The Razer Comms client has an inbuilt function to let users send feedbacks and report
problems to our developers.
Step 1. Access the feedback submission function by either:
Clicking the found on the main client window.
Click on from your Razer Comms window to display the settings
window. Select the FEEDBACK tab.

82 | For gamers. by gamers.™
Step 2. In the TYPE OF FEEDBACK drop down box, select:
I have a problem – submit a bug report
I have a suggestion – suggest ways in which Razer Comms can improve;
I have a game I would like supported – suggest a game you would like Razer
Comms to support
Other – submit general feedback.
Step 3. Describe your feedback in the textbox below. Please be as detailed as
possible.
Step 4. Check send log file to attach your Razer Comms client log with this feedback
form. This automatically selected when reporting a problem.
Step 5. Click to send an email to the Razer Support Team.

83 | razer
15. LEGALESE
COPYRIGHT AND INTELLECTUAL PROPERTY INFORMATION
©2015 Razer Inc. All Rights Reserved. Razer, the Razer Triple-Headed Snake logo, the
Razer distressed word logo and other trademarks contained herein are trademarks or
registered trademarks of Razer Inc. and/or its affiliated or associated companies,
registered in the United States and/or other countries. Windows and the Windows logo
are trademarks of the Microsoft group of companies.
Razer Inc. (“Razer”) may have copyright, trademarks, trade secrets, patents, patent
applications, or other intellectual property rights (whether registered or unregistered)
concerning the product in this Master Guide. Furnishing of this Master Guide does not
give you a license to any such copyright, trademark, patent or other intellectual
property right. Razer Comms (the “Product”) may differ from pictures whether on
packaging or otherwise. Razer assumes no responsibility for such differences or for any
errors that may appear. Information contained herein is subject to change without
notice.
